
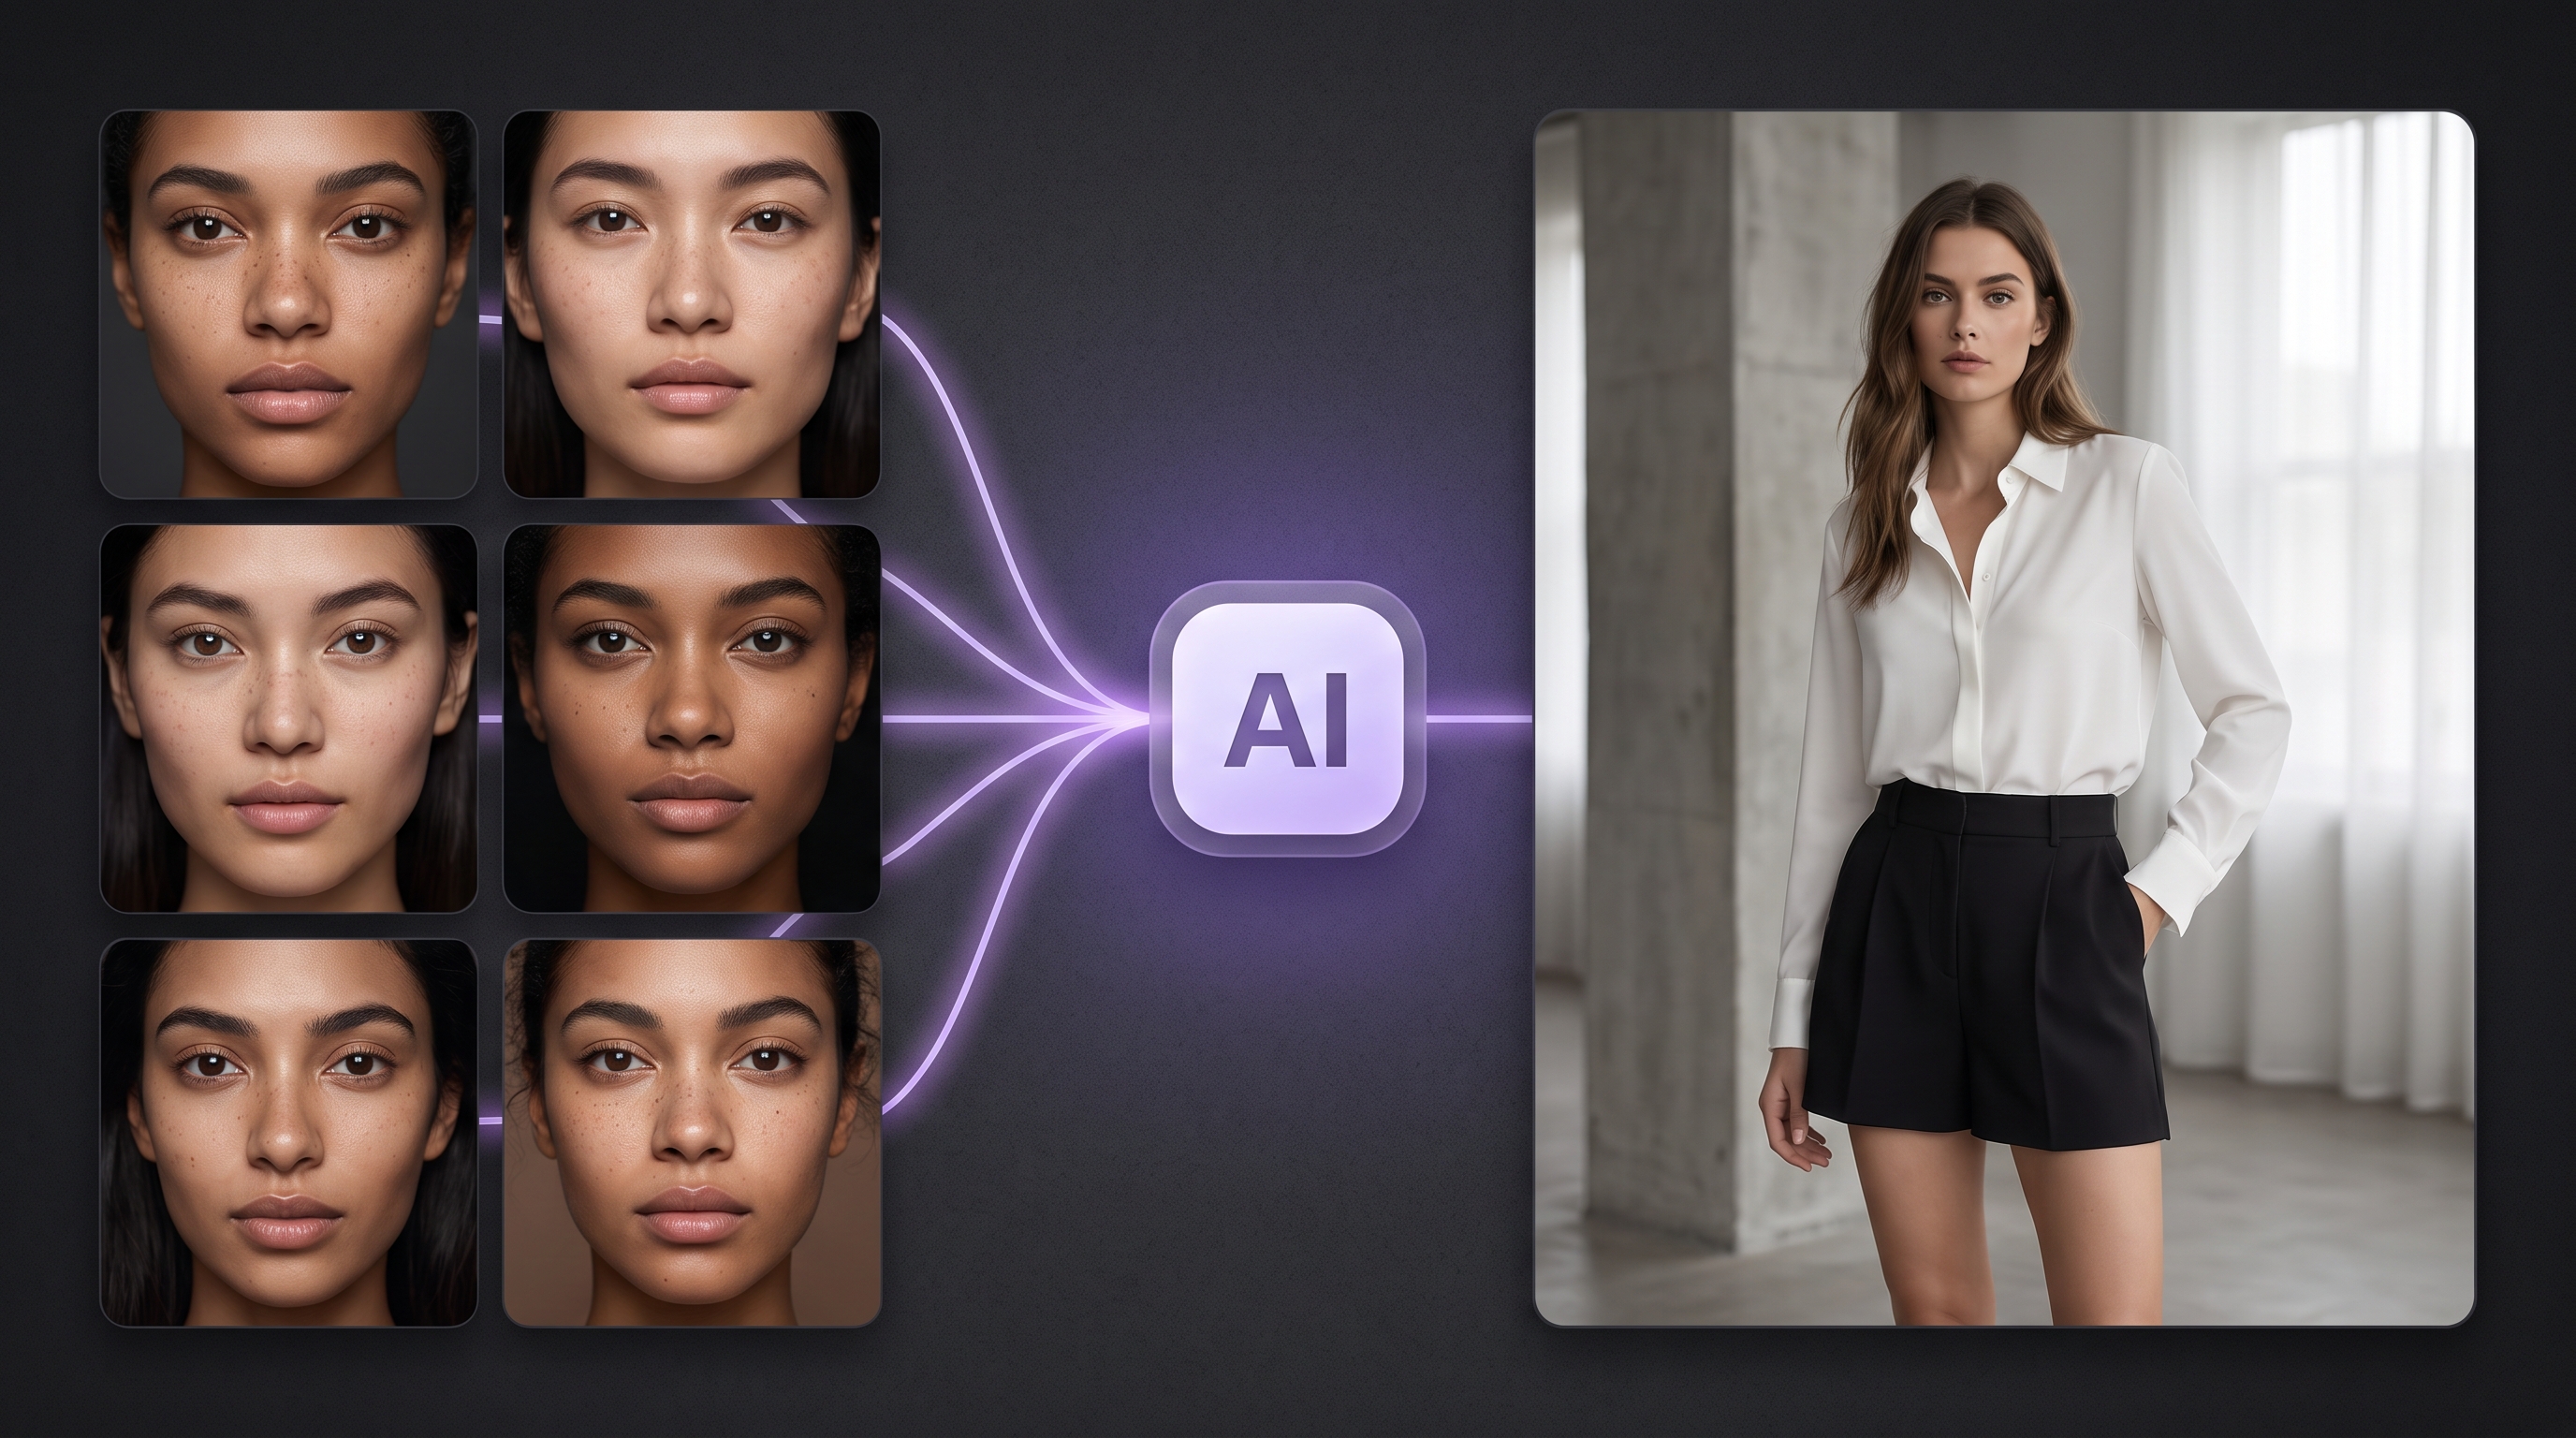
What if you could run a whole fashion photoshoot, with one consistent model, several outfits, cinematic backgrounds, and magazine-quality faces, and never book a photographer?
That's exactly what we set out to do, and this is the 9-step pipeline we landed on, start to finish, using nothing but ComfyUIFlows Studio tools. We've written down every setting, every slider value, and every prompt we used, so you can follow along with your own products and get there yourself.
By the end, you'll have photoshoot-ready 4K editorial images that look like they came from a $10,000 production — all for a few dollars in credits.
The Complete 9-Step Pipeline
| Step | Tool Used | Purpose | Time |
|---|---|---|---|
| 1 | Guided Edit | Create AI base face | 5 min |
| 2 | Multi Input Composition | Build training dataset | 15 min |
| 3 | Caption Generator | Auto-caption dataset images | 5 min |
| 4 | Model Training Studio | Train custom LoRA model | 2–3 hrs |
| 5 | Pose Transfer Pro | Generate 6 base images | 10 min |
| 6 | Image Remove BG | Remove backgrounds | 2 min |
| 7 | Scene Styling Model | Add cinematic 4K backgrounds | 5 min |
| 8 | Flat Layout Designer | Swap real clothes onto model | 10 min |
| 9 | Face Refinement Pro | Perfect face detail with LoRA | 5 min |
Total active time: ~1 hour (plus 2-3 hours unattended LoRA training)
Step 1: Create your base face with Guided Edit
Every great AI photoshoot starts with a consistent model identity. We used the Guided Edit tool to generate a base AI face that would serve as the foundation for our entire LoRA training dataset.
You can use either:
- An AI-generated face: perfect for brands that want a unique virtual model
- A real person's photo: use your own portrait for personal brand shoots
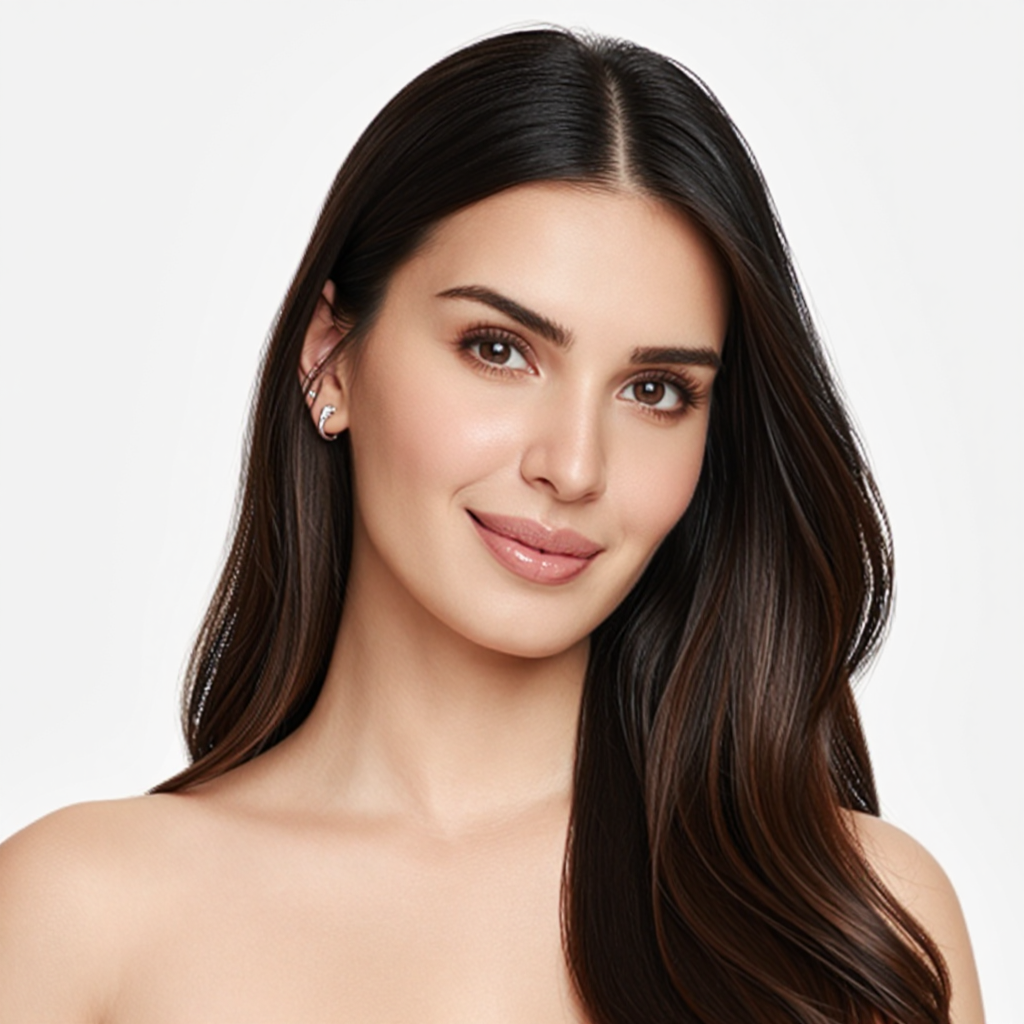
Our base face: a clean, well-lit portrait that anchors the identity for the whole project.
Pro Tips for the Base Face
- Choose a neutral expression with even lighting
- Front-facing or slight 3/4 angle works best
- Avoid heavy filters or extreme processing
- Minimum resolution: 512×512, recommended: 1024×1024
Step 2: Build your training dataset with Multi Input Composition
A LoRA model needs 20-40 diverse images of the same face in different poses, lighting, and angles. We used the Multi Input Composition tool to generate 36 training images from our single base face.
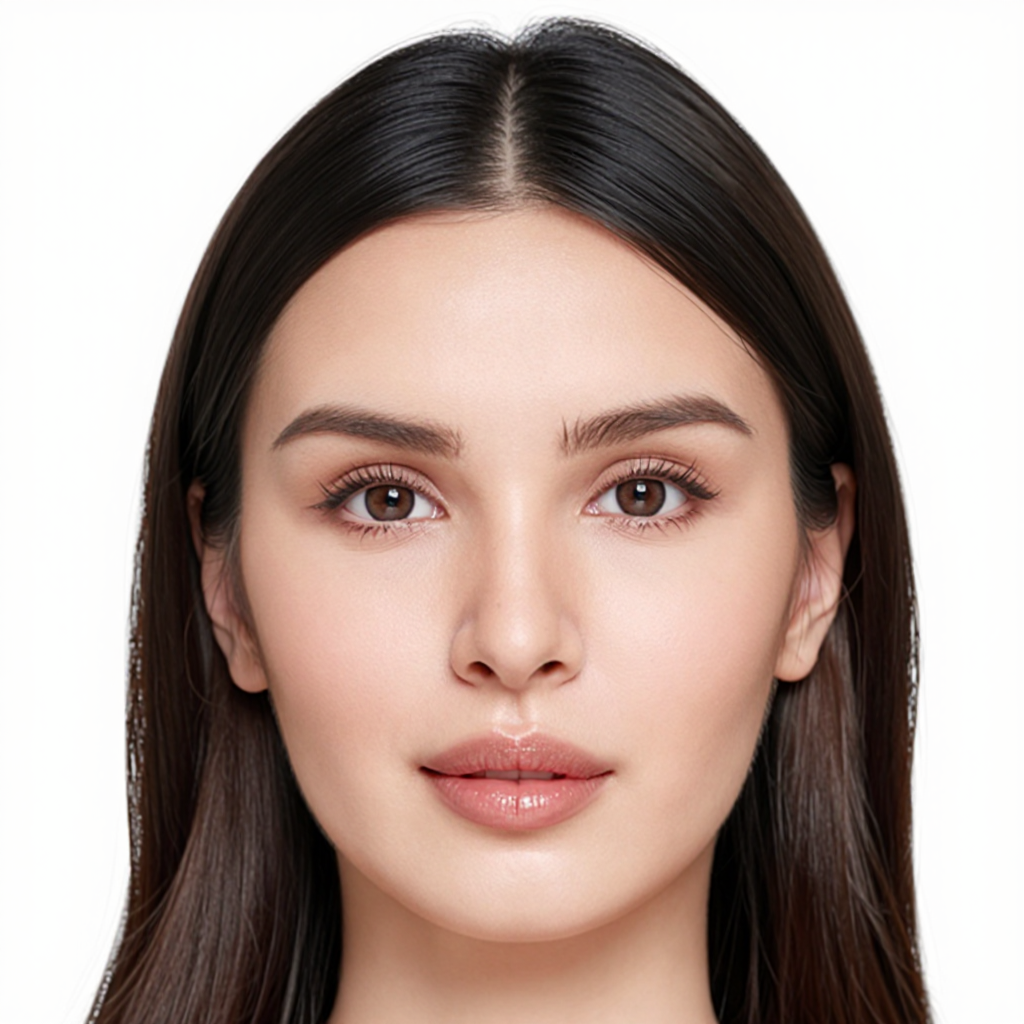
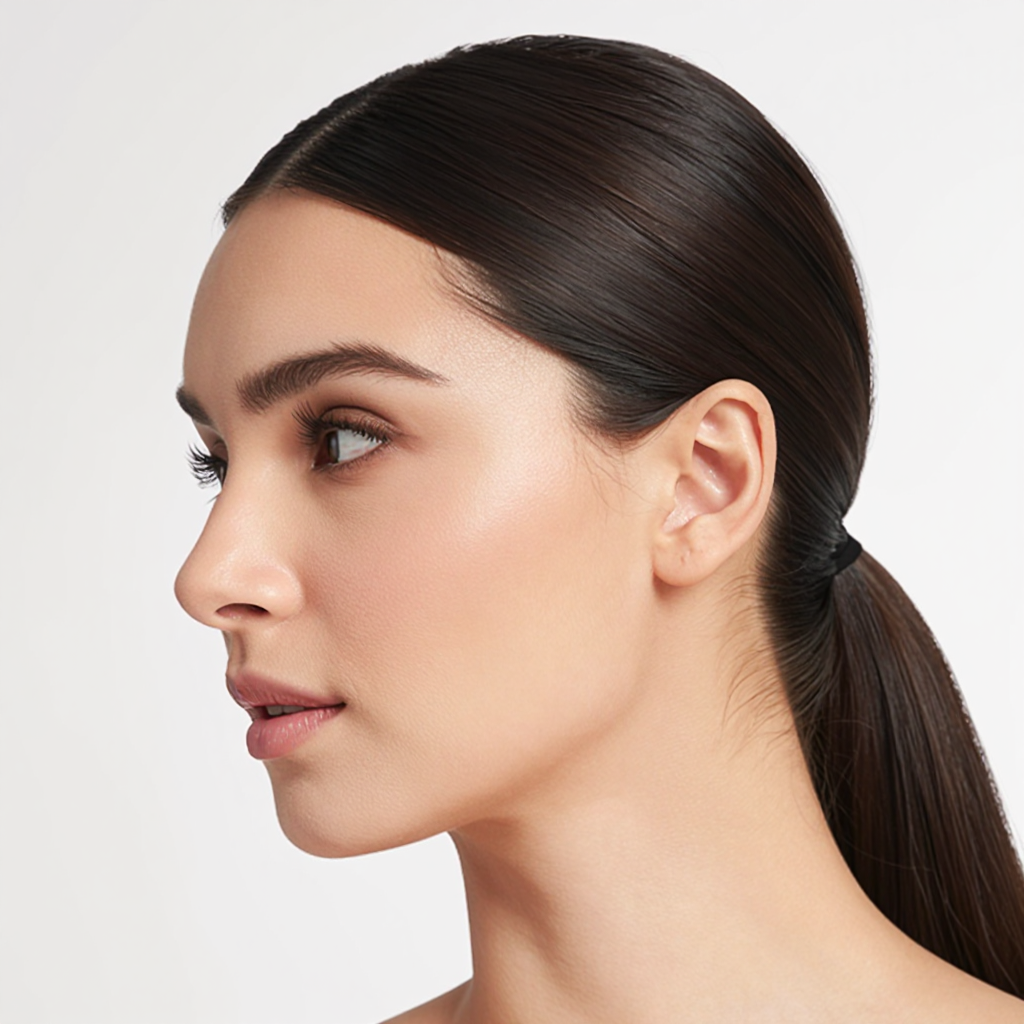
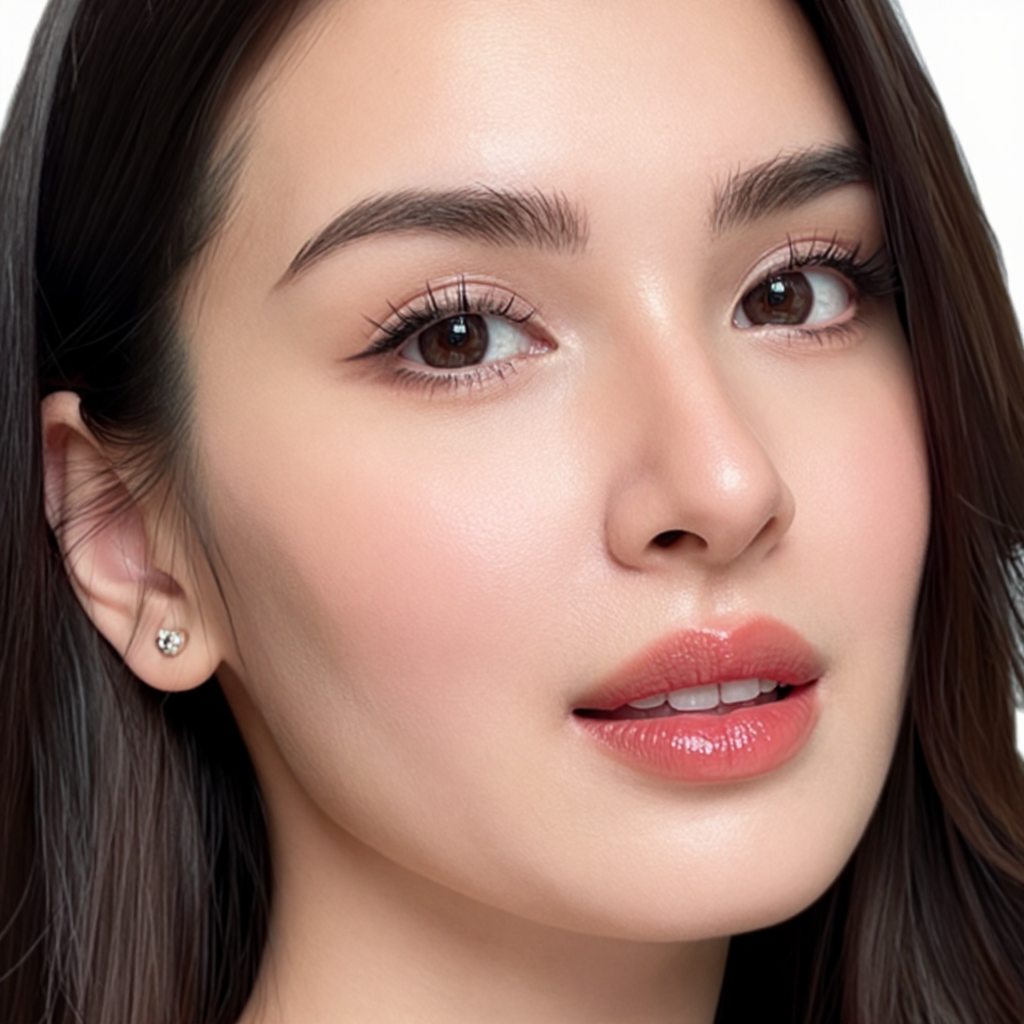
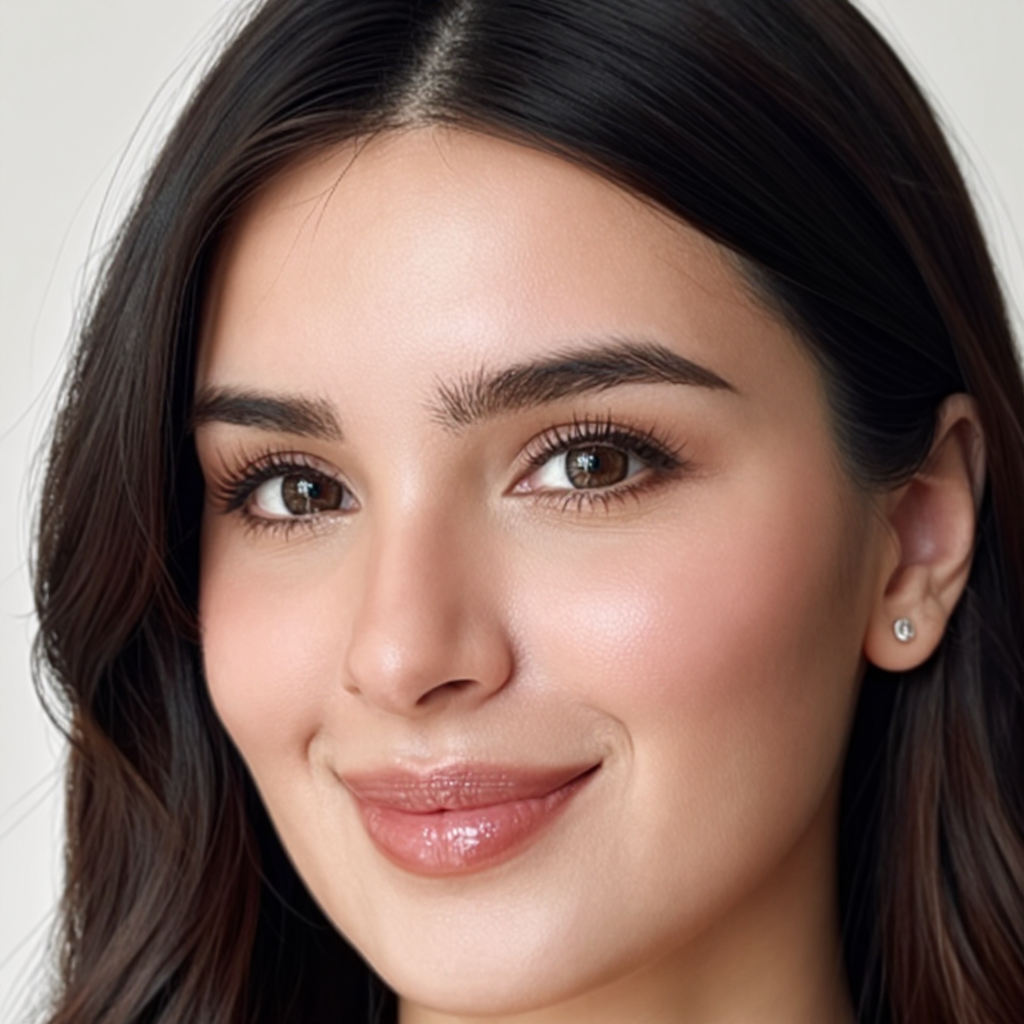
Four of our 36 dataset samples. Notice how the pose, angle, and expression change while the face stays the same person.
Dataset Best Practices
- Diversity is key: Include close-ups, half-body, full-body, different angles
- Consistent identity: The face should be recognizably the same person in every image
- Varied clothing: Don't use the same outfit in every image — it confuses the model
- Clean backgrounds: Solid or simple backgrounds train cleaner
- Minimum 20 images for good results, 35+ for excellent results
Step 3: Auto-caption the dataset with the Caption Generator
Every training image needs a detailed text caption describing what's in it. Doing this manually for 36 images is tedious — our Caption Generator tool handles it automatically.
The tool analyzes each image and creates captions like:
"A young woman with dark hair and brown eyes, wearing a white turtleneck sweater, photographed from a 3/4 angle against a soft gray background with natural window lighting"
Why Captions Matter for LoRA Training
- Captions tell the model what to associate with the trigger word
- Bad or missing captions = blurry, inconsistent face outputs
- Our auto-captioner produces detailed, training-optimized descriptions
- Always review a few captions to check accuracy before training
Step 4: Train your custom LoRA in the Model Training Studio
This is the core step. We uploaded our captioned dataset to the Model Training Studio and trained two LoRA models:
| LoRA File | Purpose | Training Focus |
|---|---|---|
xarnish_imagezface.safetensors | Face identity lock | Facial features, expressions, skin texture |
xarnish_bodyv2.safetensors | Body consistency | Body proportions, posture, skin tone |
Critical Training Details
- Trigger word:
xarnish— this is the magic keyword that activates the LoRA - Training time: ~2-3 hours (runs in the background — you can close the browser)
- Two LoRA files: One for face, one for body — used together they produce perfect full-body consistency
What is a trigger word?
A trigger word is a unique keyword (like xarnish) that you choose during training. When you include this word in your prompts later, it activates the LoRA model and tells the AI to generate images with your trained face/body identity. Think of it as a "summon" command for your custom model.
Tips for choosing a trigger word:
- Use a made-up word that doesn't exist in normal language (e.g.,
xarnish,z3nith,flarex) - Keep it short (6-8 characters) and easy to type
- Avoid real words — they'll conflict with the base model's existing knowledge
Step 5: Generate base images with Pose Transfer Pro
With our trained LoRA ready, we used Pose Transfer Pro (or Style Transfer) to generate 6 base images featuring our custom model identity in different poses.
Exact Settings Used
| Setting | Value | Why |
|---|---|---|
| LoRA 1 | xarnish_imagezface.safetensors | Face identity |
| LoRA 1 Strength | 0.90 | Strong face lock without artifacts |
| LoRA 2 | xarnish_bodyv2.safetensors | Body consistency |
| LoRA 2 Strength | 0.85 | Balanced body preservation |
| Face Temperature Start | 0.60 | Initial inpainting strength |
| Face Temperature End | 0.24 | Final refinement strength |
| Control Strength | 0.80 | Pose adherence |
| Megapixel | 2.5 | High detail output |
| Aspect Ratio | 3:4 (Golden Ratio) | Fashion-standard portrait |
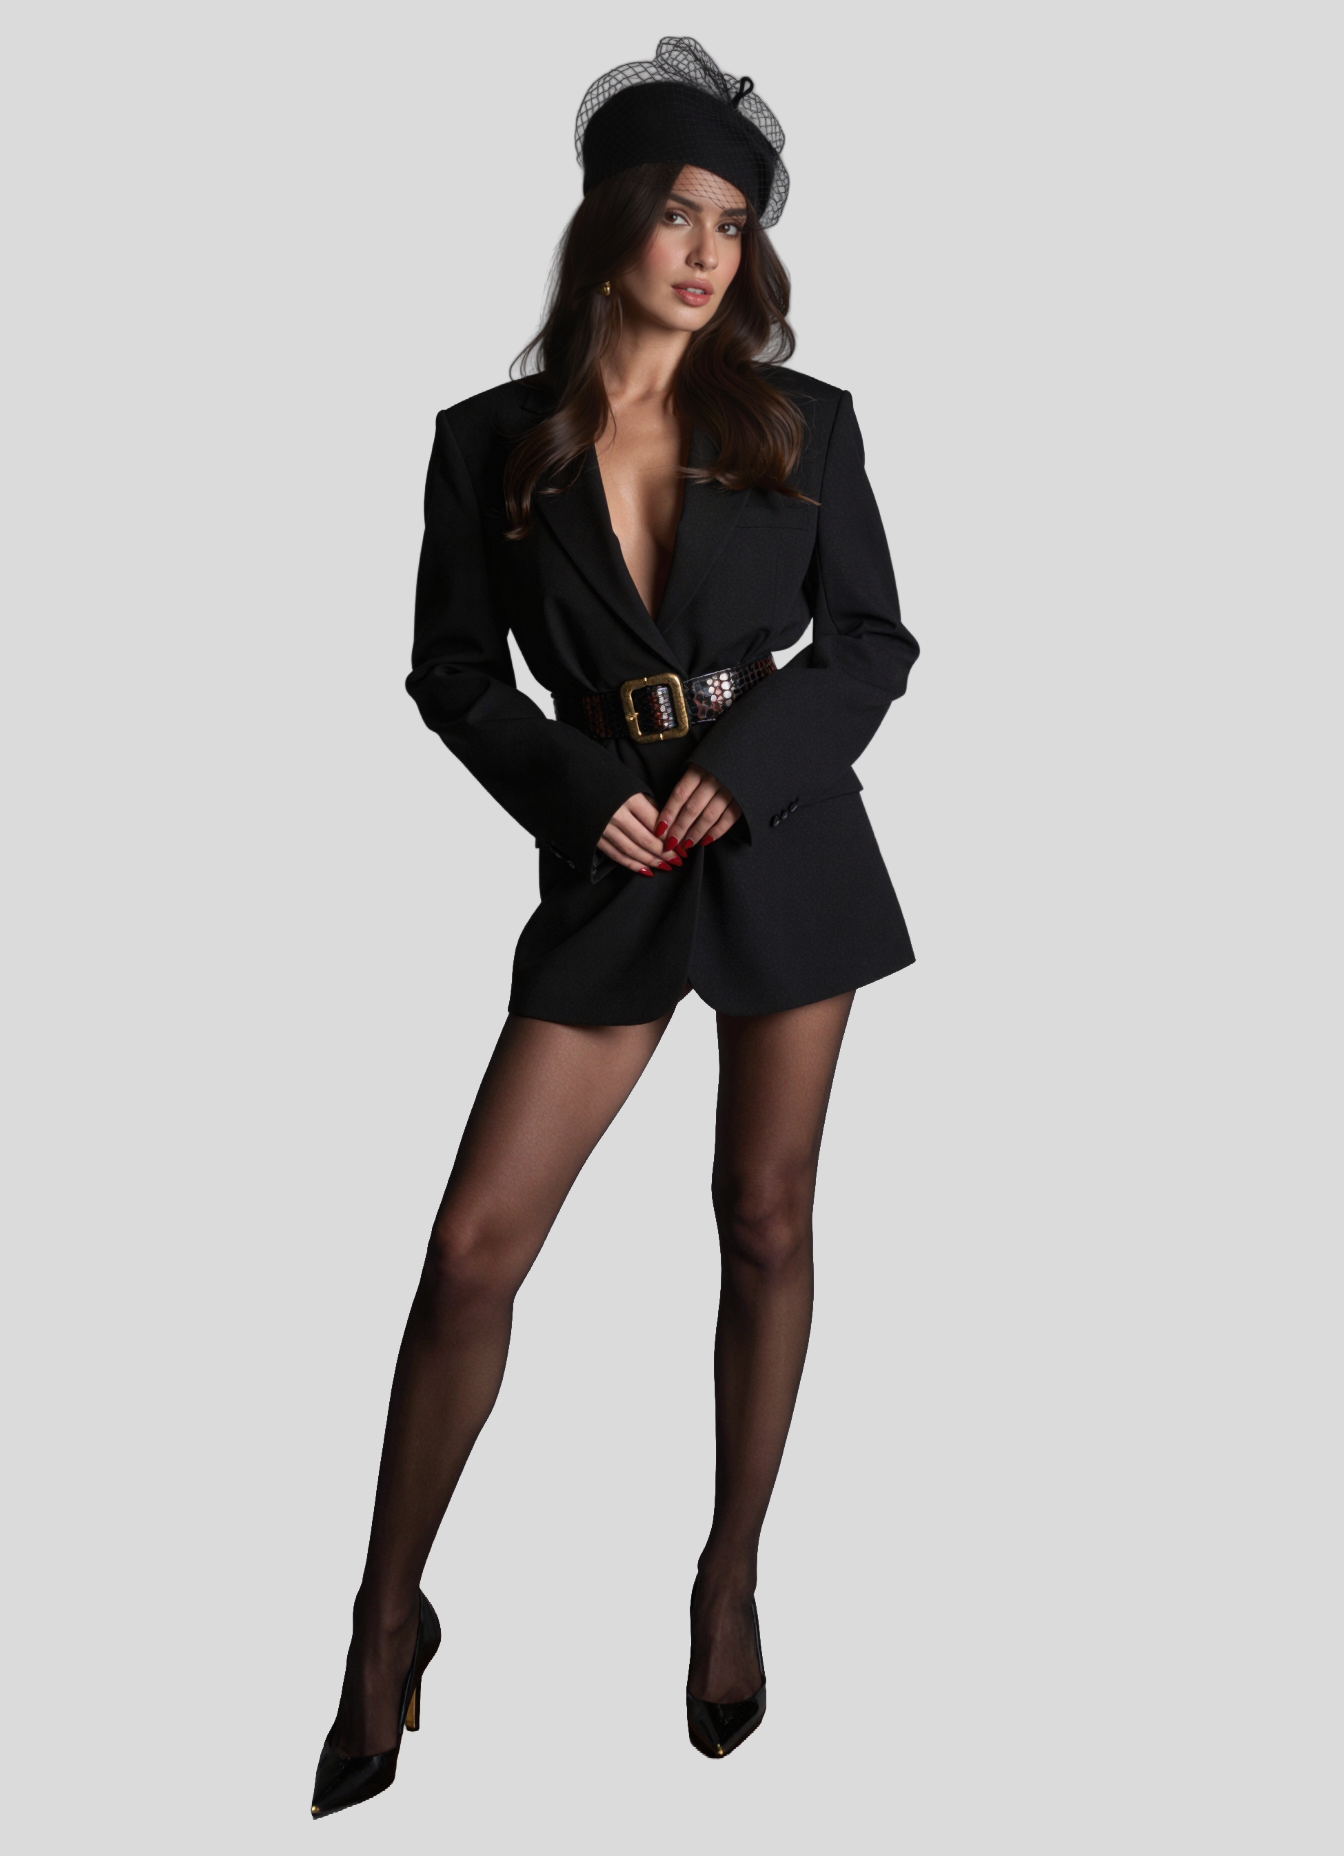
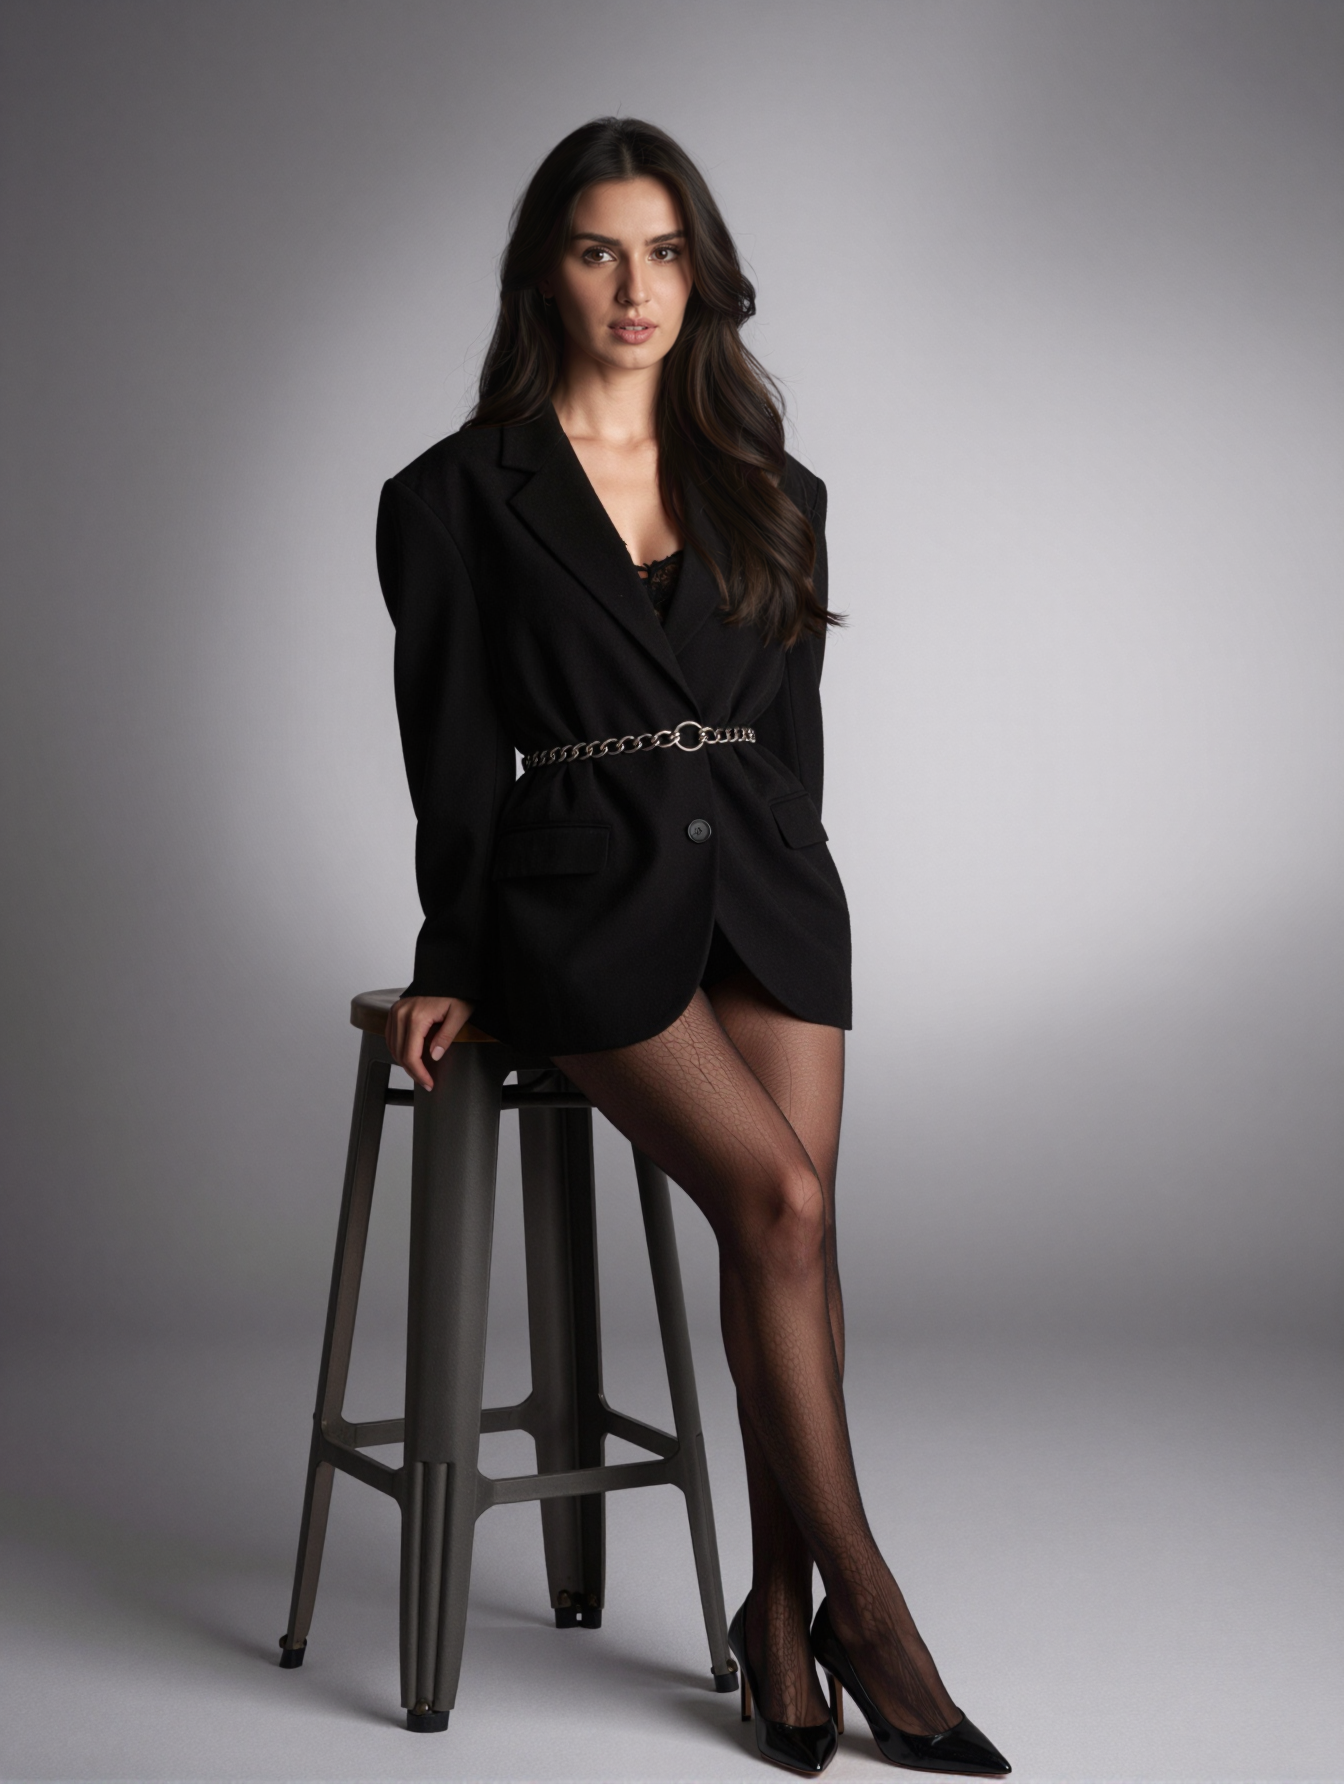
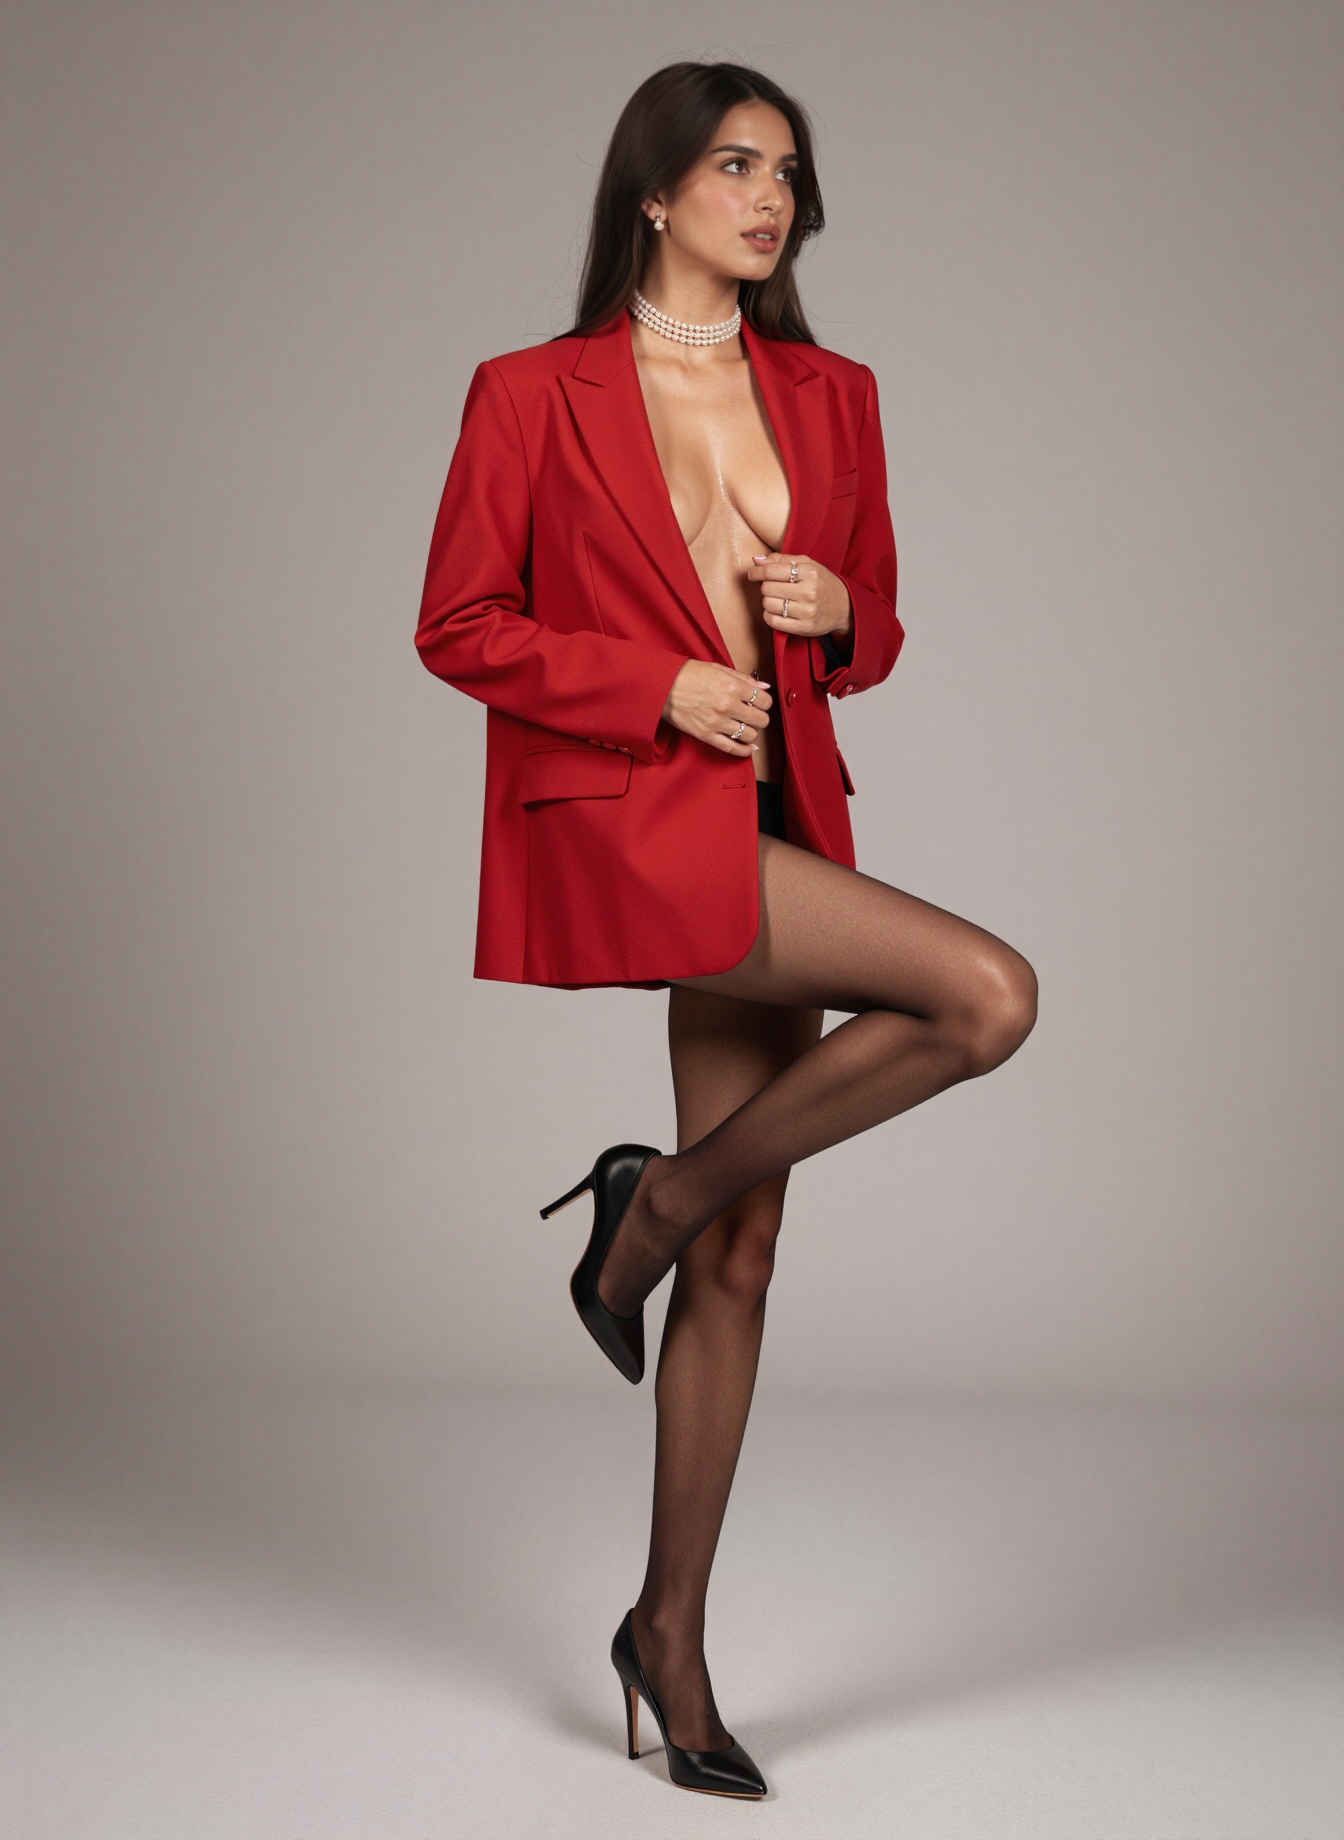
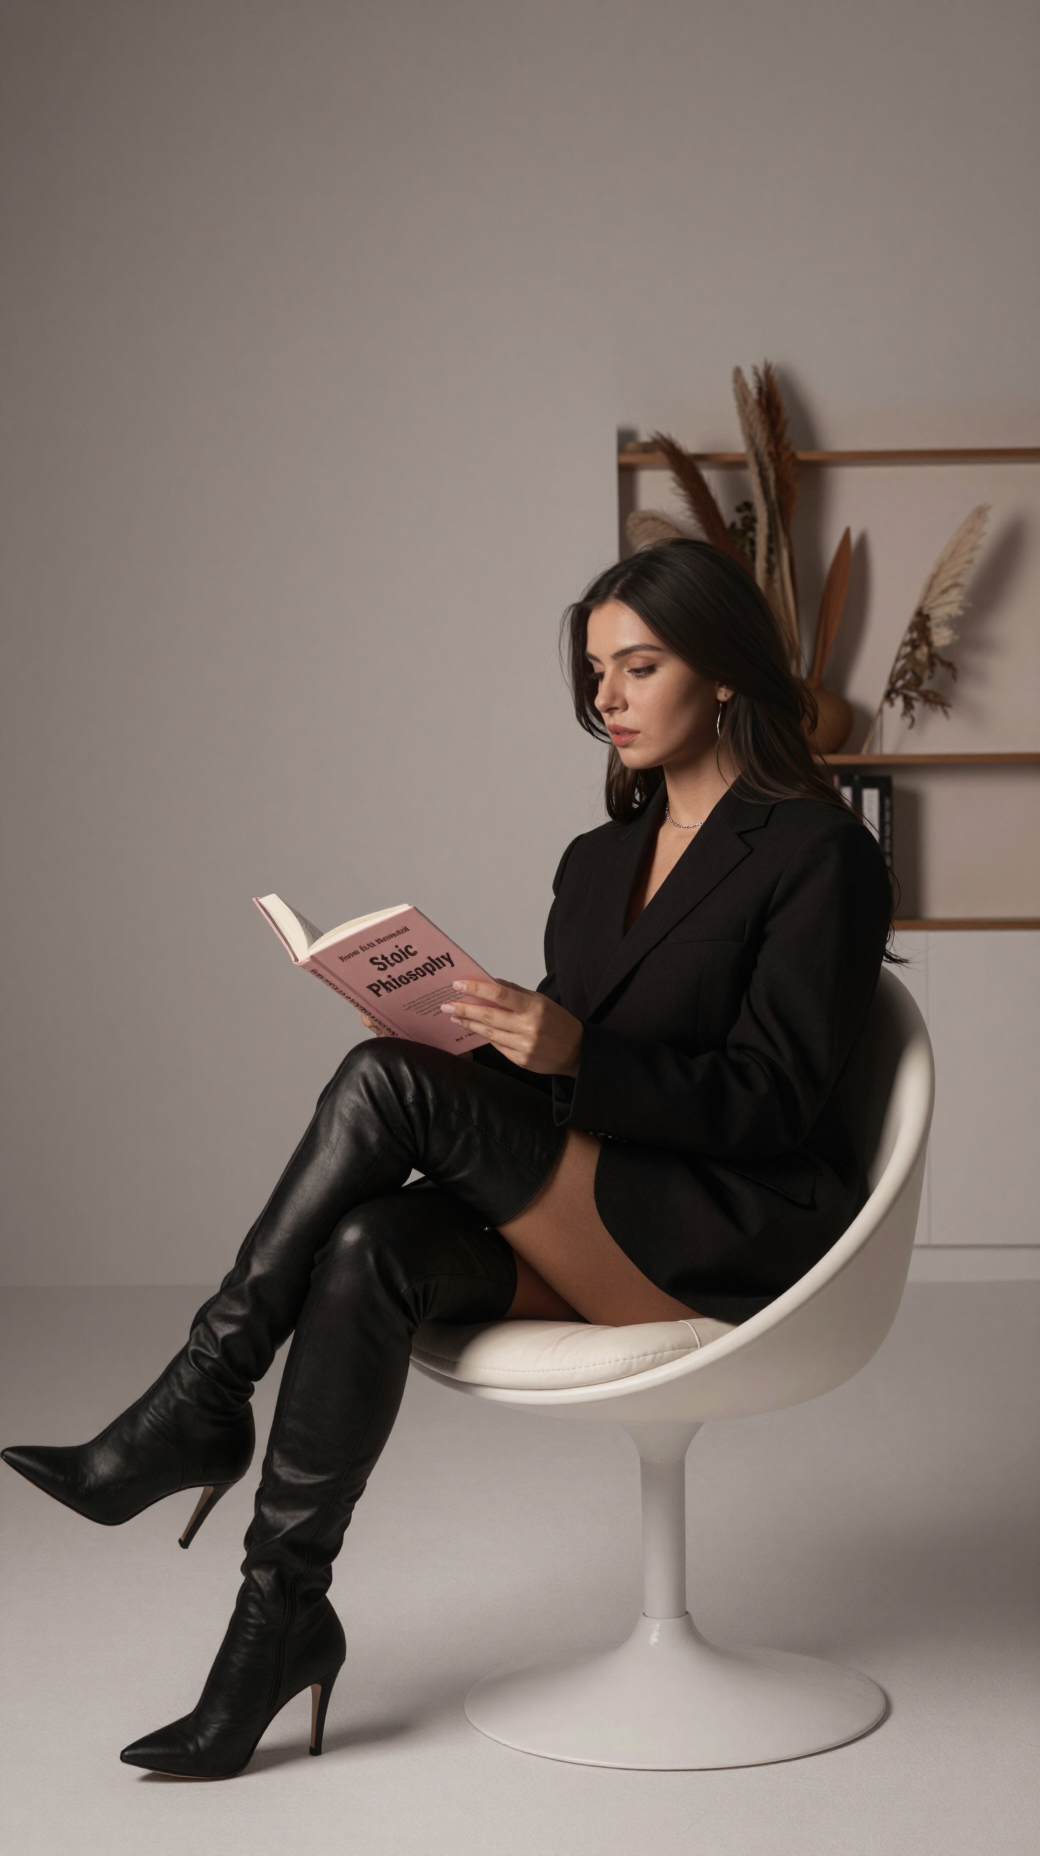
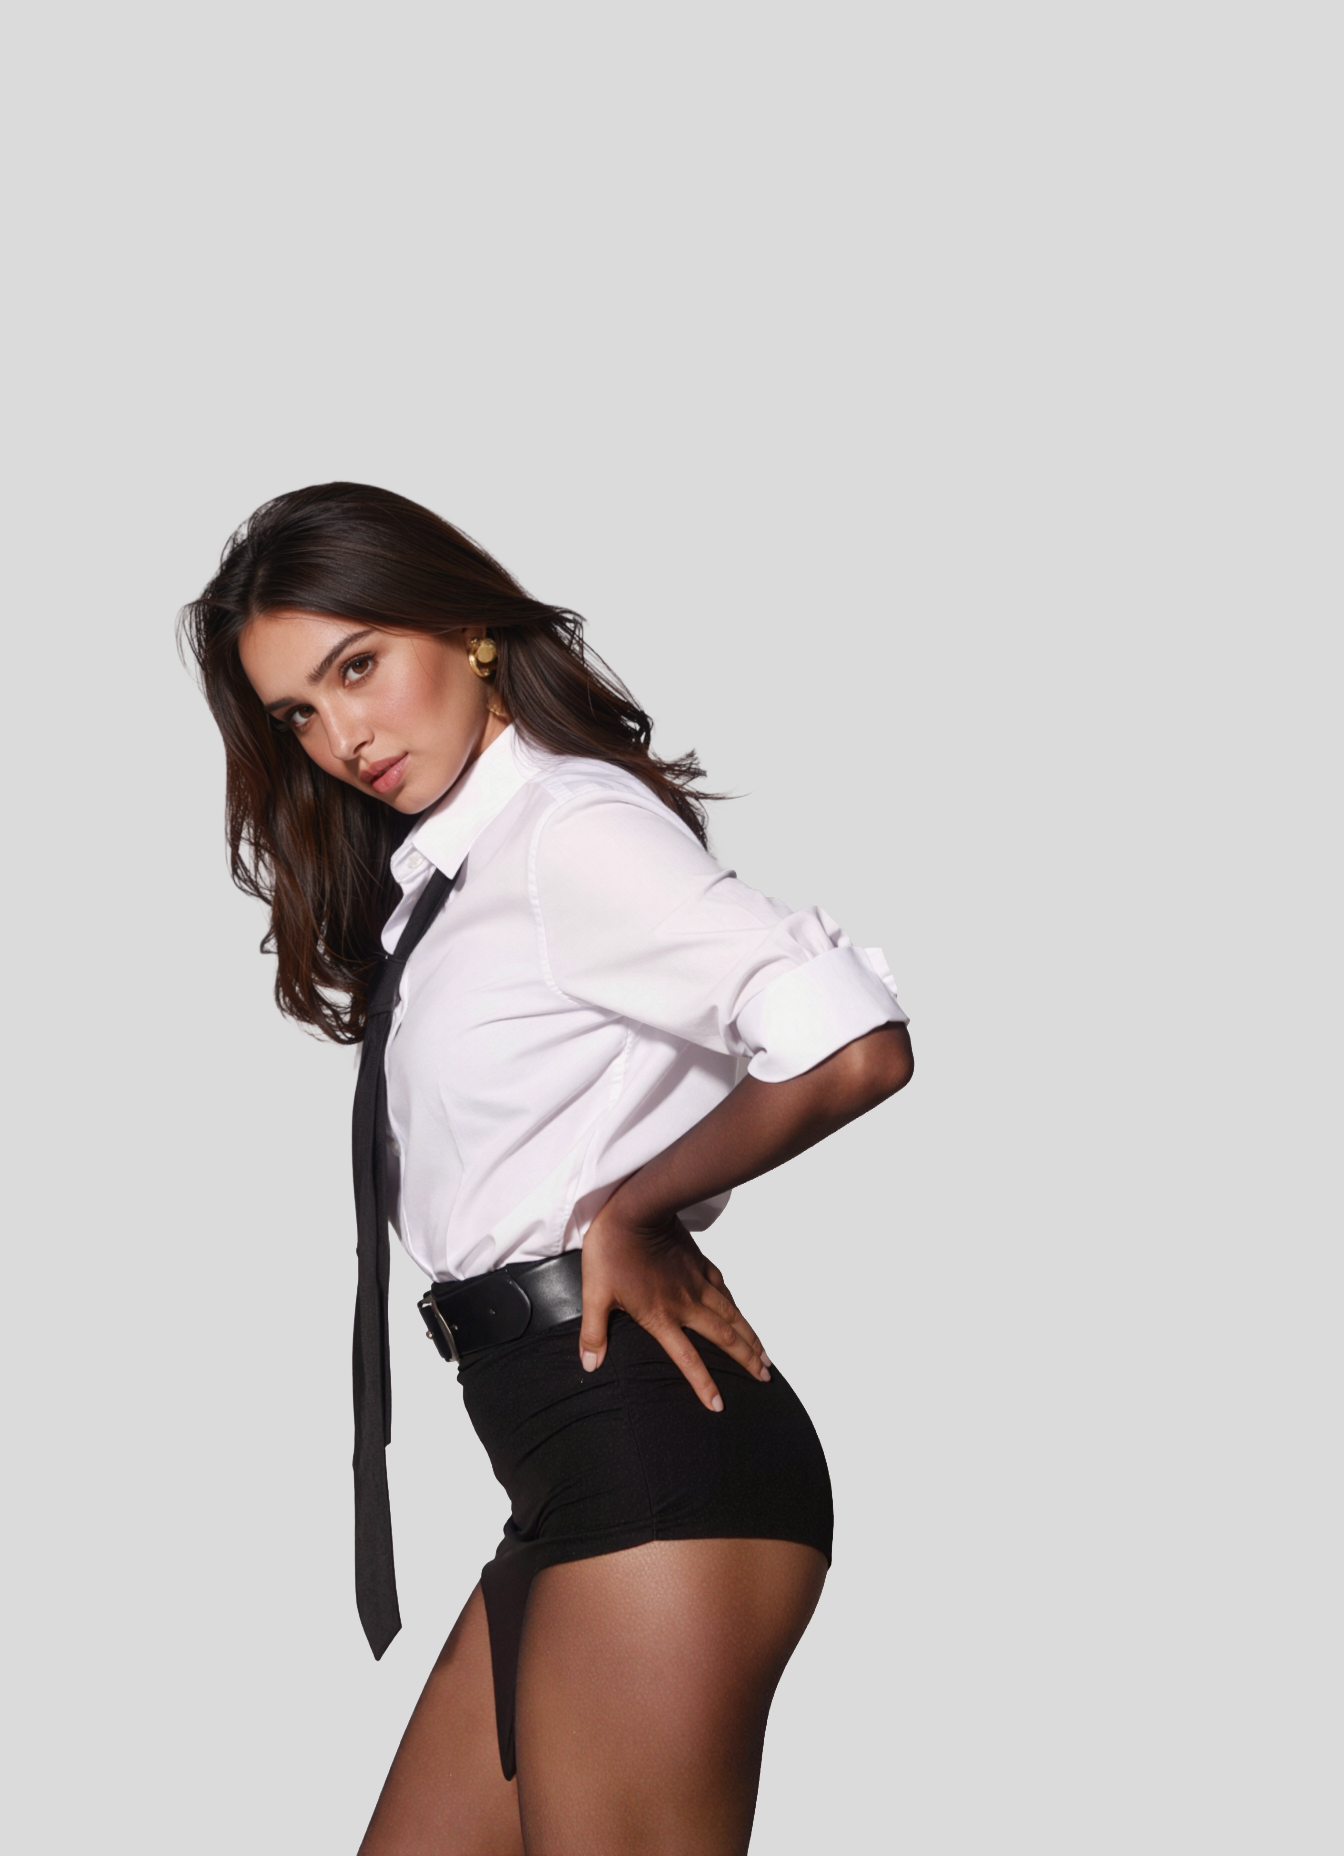
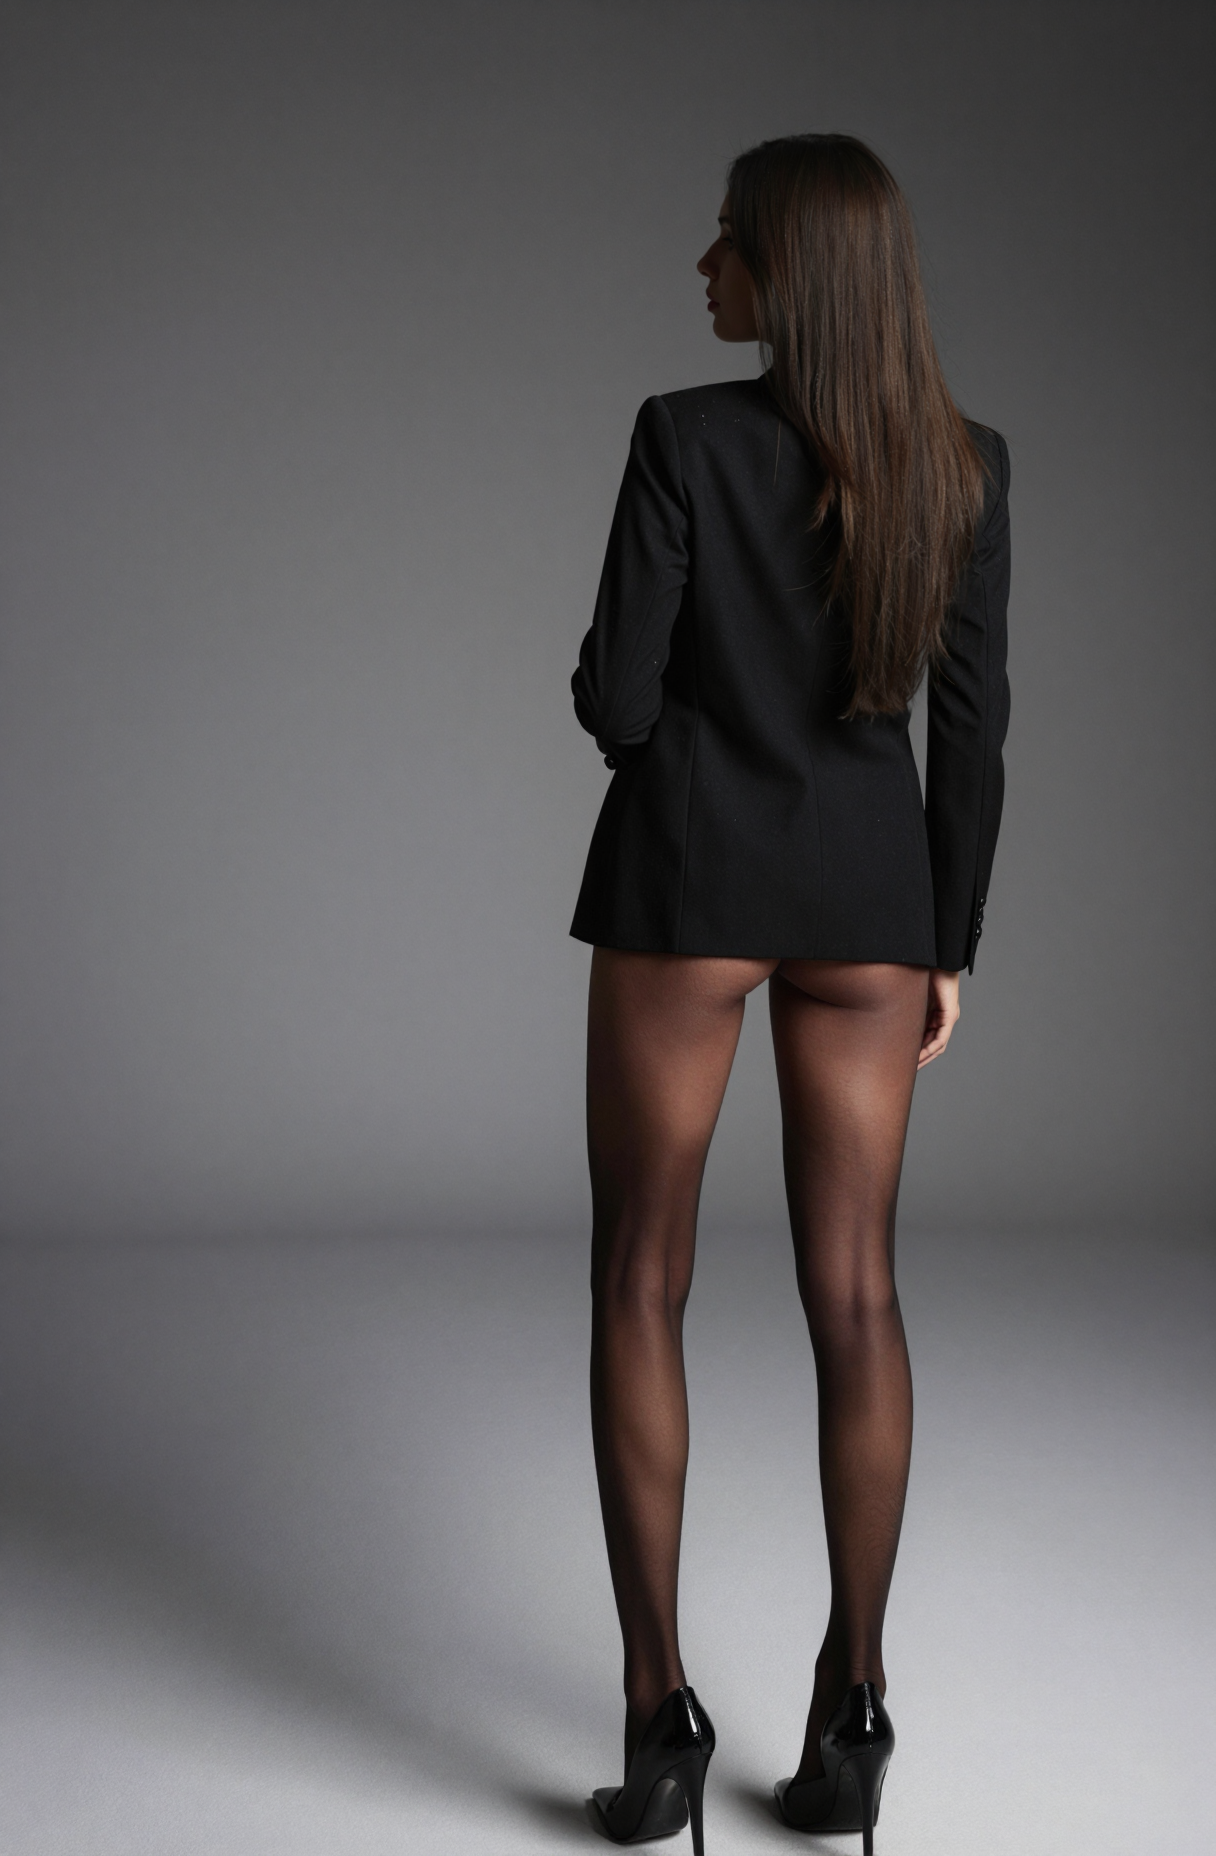
All six base images from our custom LoRA. The face stays consistent across every pose.
Example Prompt for Generation
Key: Always start your prompt with the trigger word xarnish to activate the trained LoRA identity.
Step 6: Remove the backgrounds with Image Remove BG
Next, we stripped the backgrounds from all 6 base images using the Image Remove BG tool. This is a one-click process that isolates the model on a transparent background.
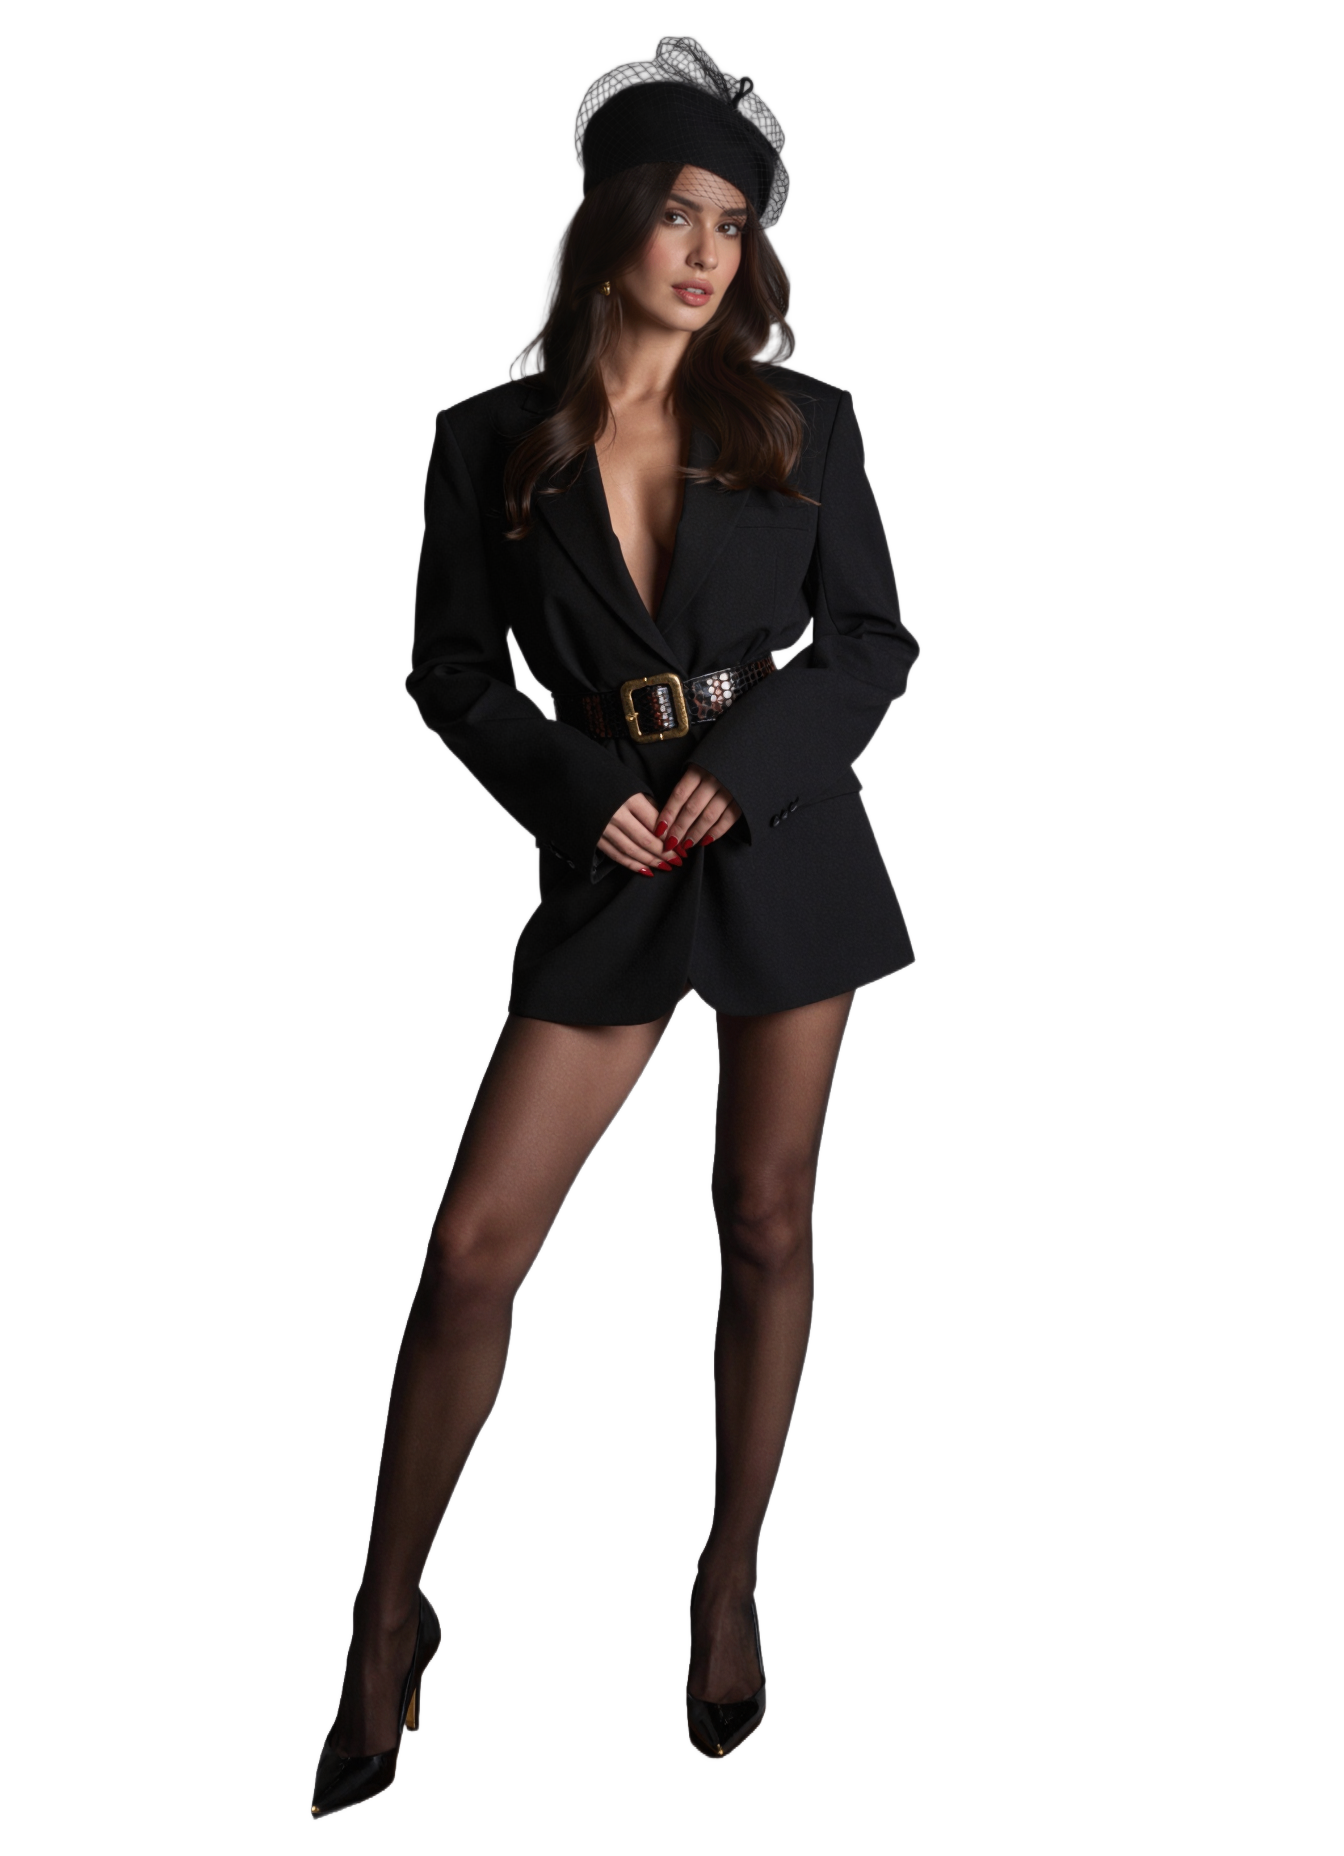
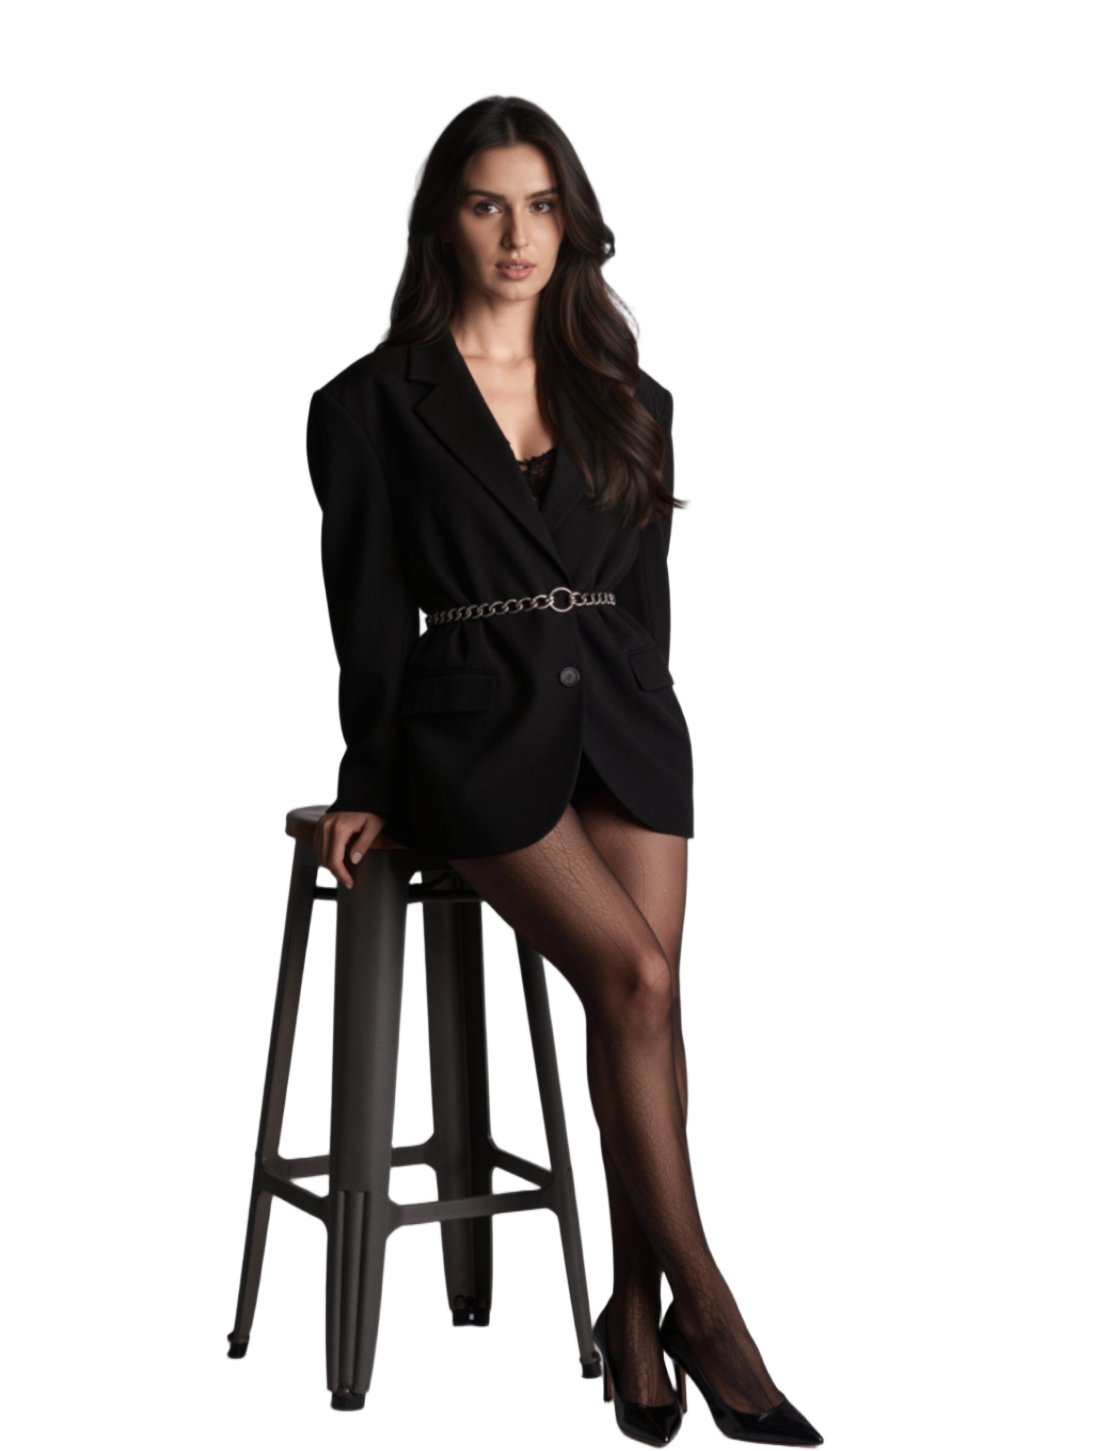
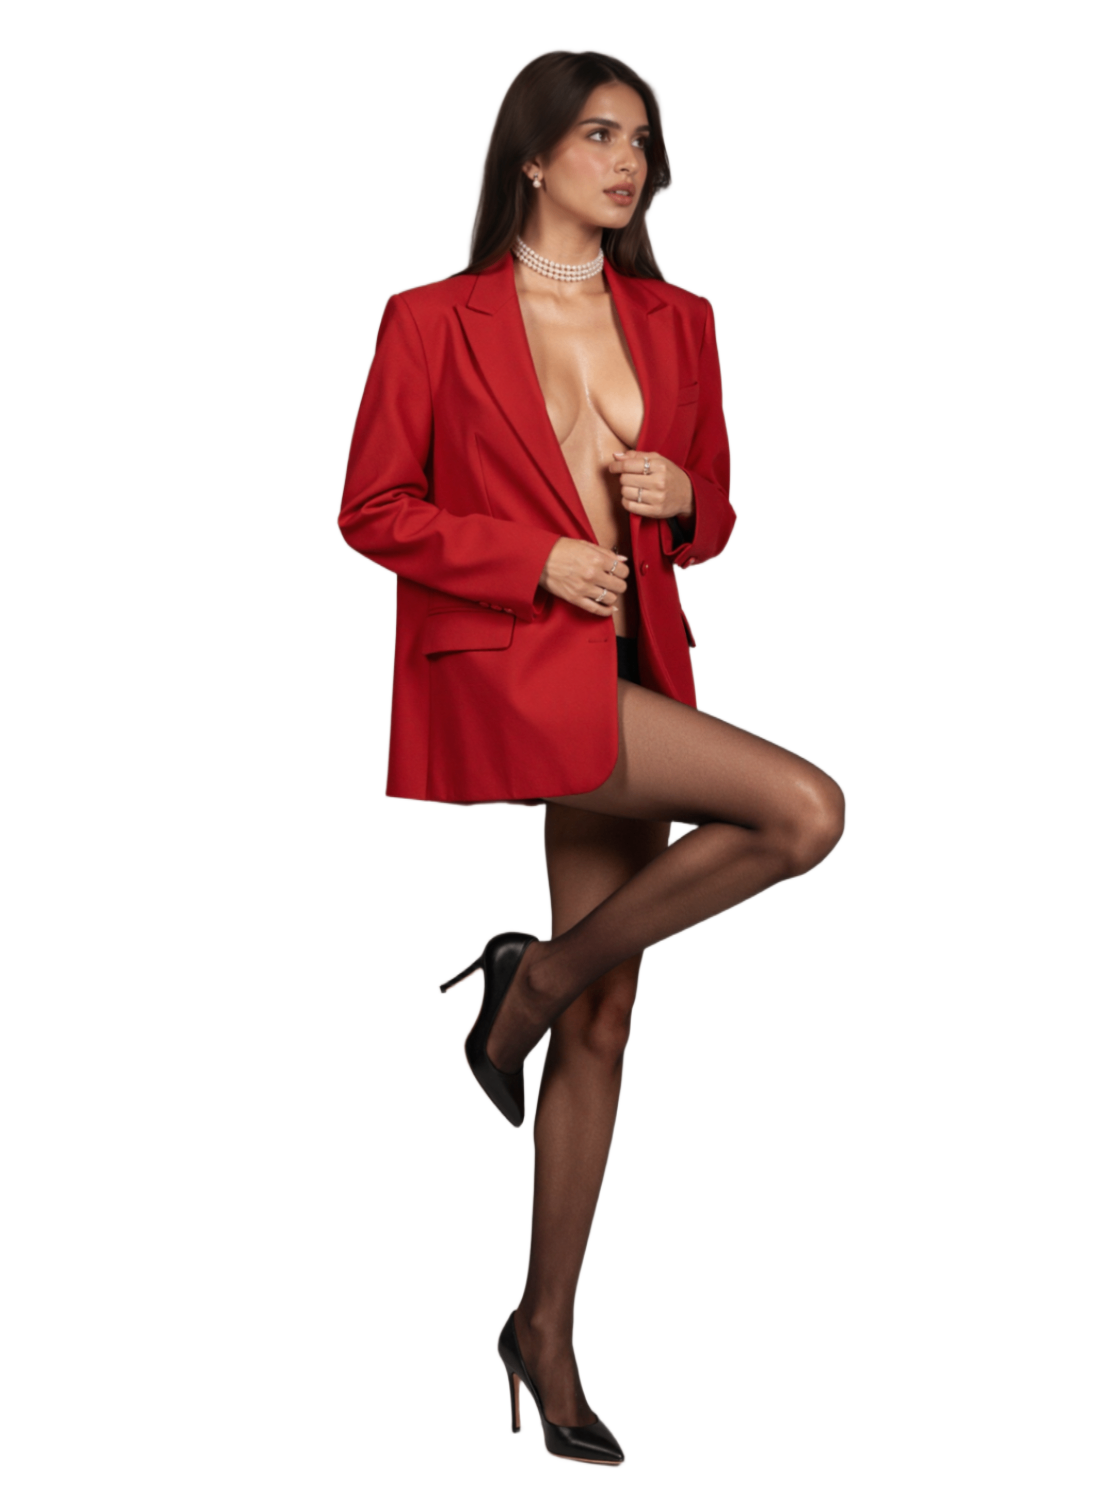
Clean transparent backgrounds, ready for scene styling.
Why Remove BG Before Scene Styling?
- Cleaner edges = more natural compositing
- The Scene Styling tool works better with isolated subjects
- You can reuse the same cutout with multiple backgrounds
- Credits: Free! Background removal costs 0 credits
Step 7: Add cinematic backgrounds with the Scene Styling Model
The Scene Styling Model is the tool that surprised us most. You hand it your cut-out model, and it drops them into a photorealistic, cinematic setting on its own, no text prompt needed.
The tool intelligently matches lighting, shadows, and perspective to create images that look like they were shot on location.
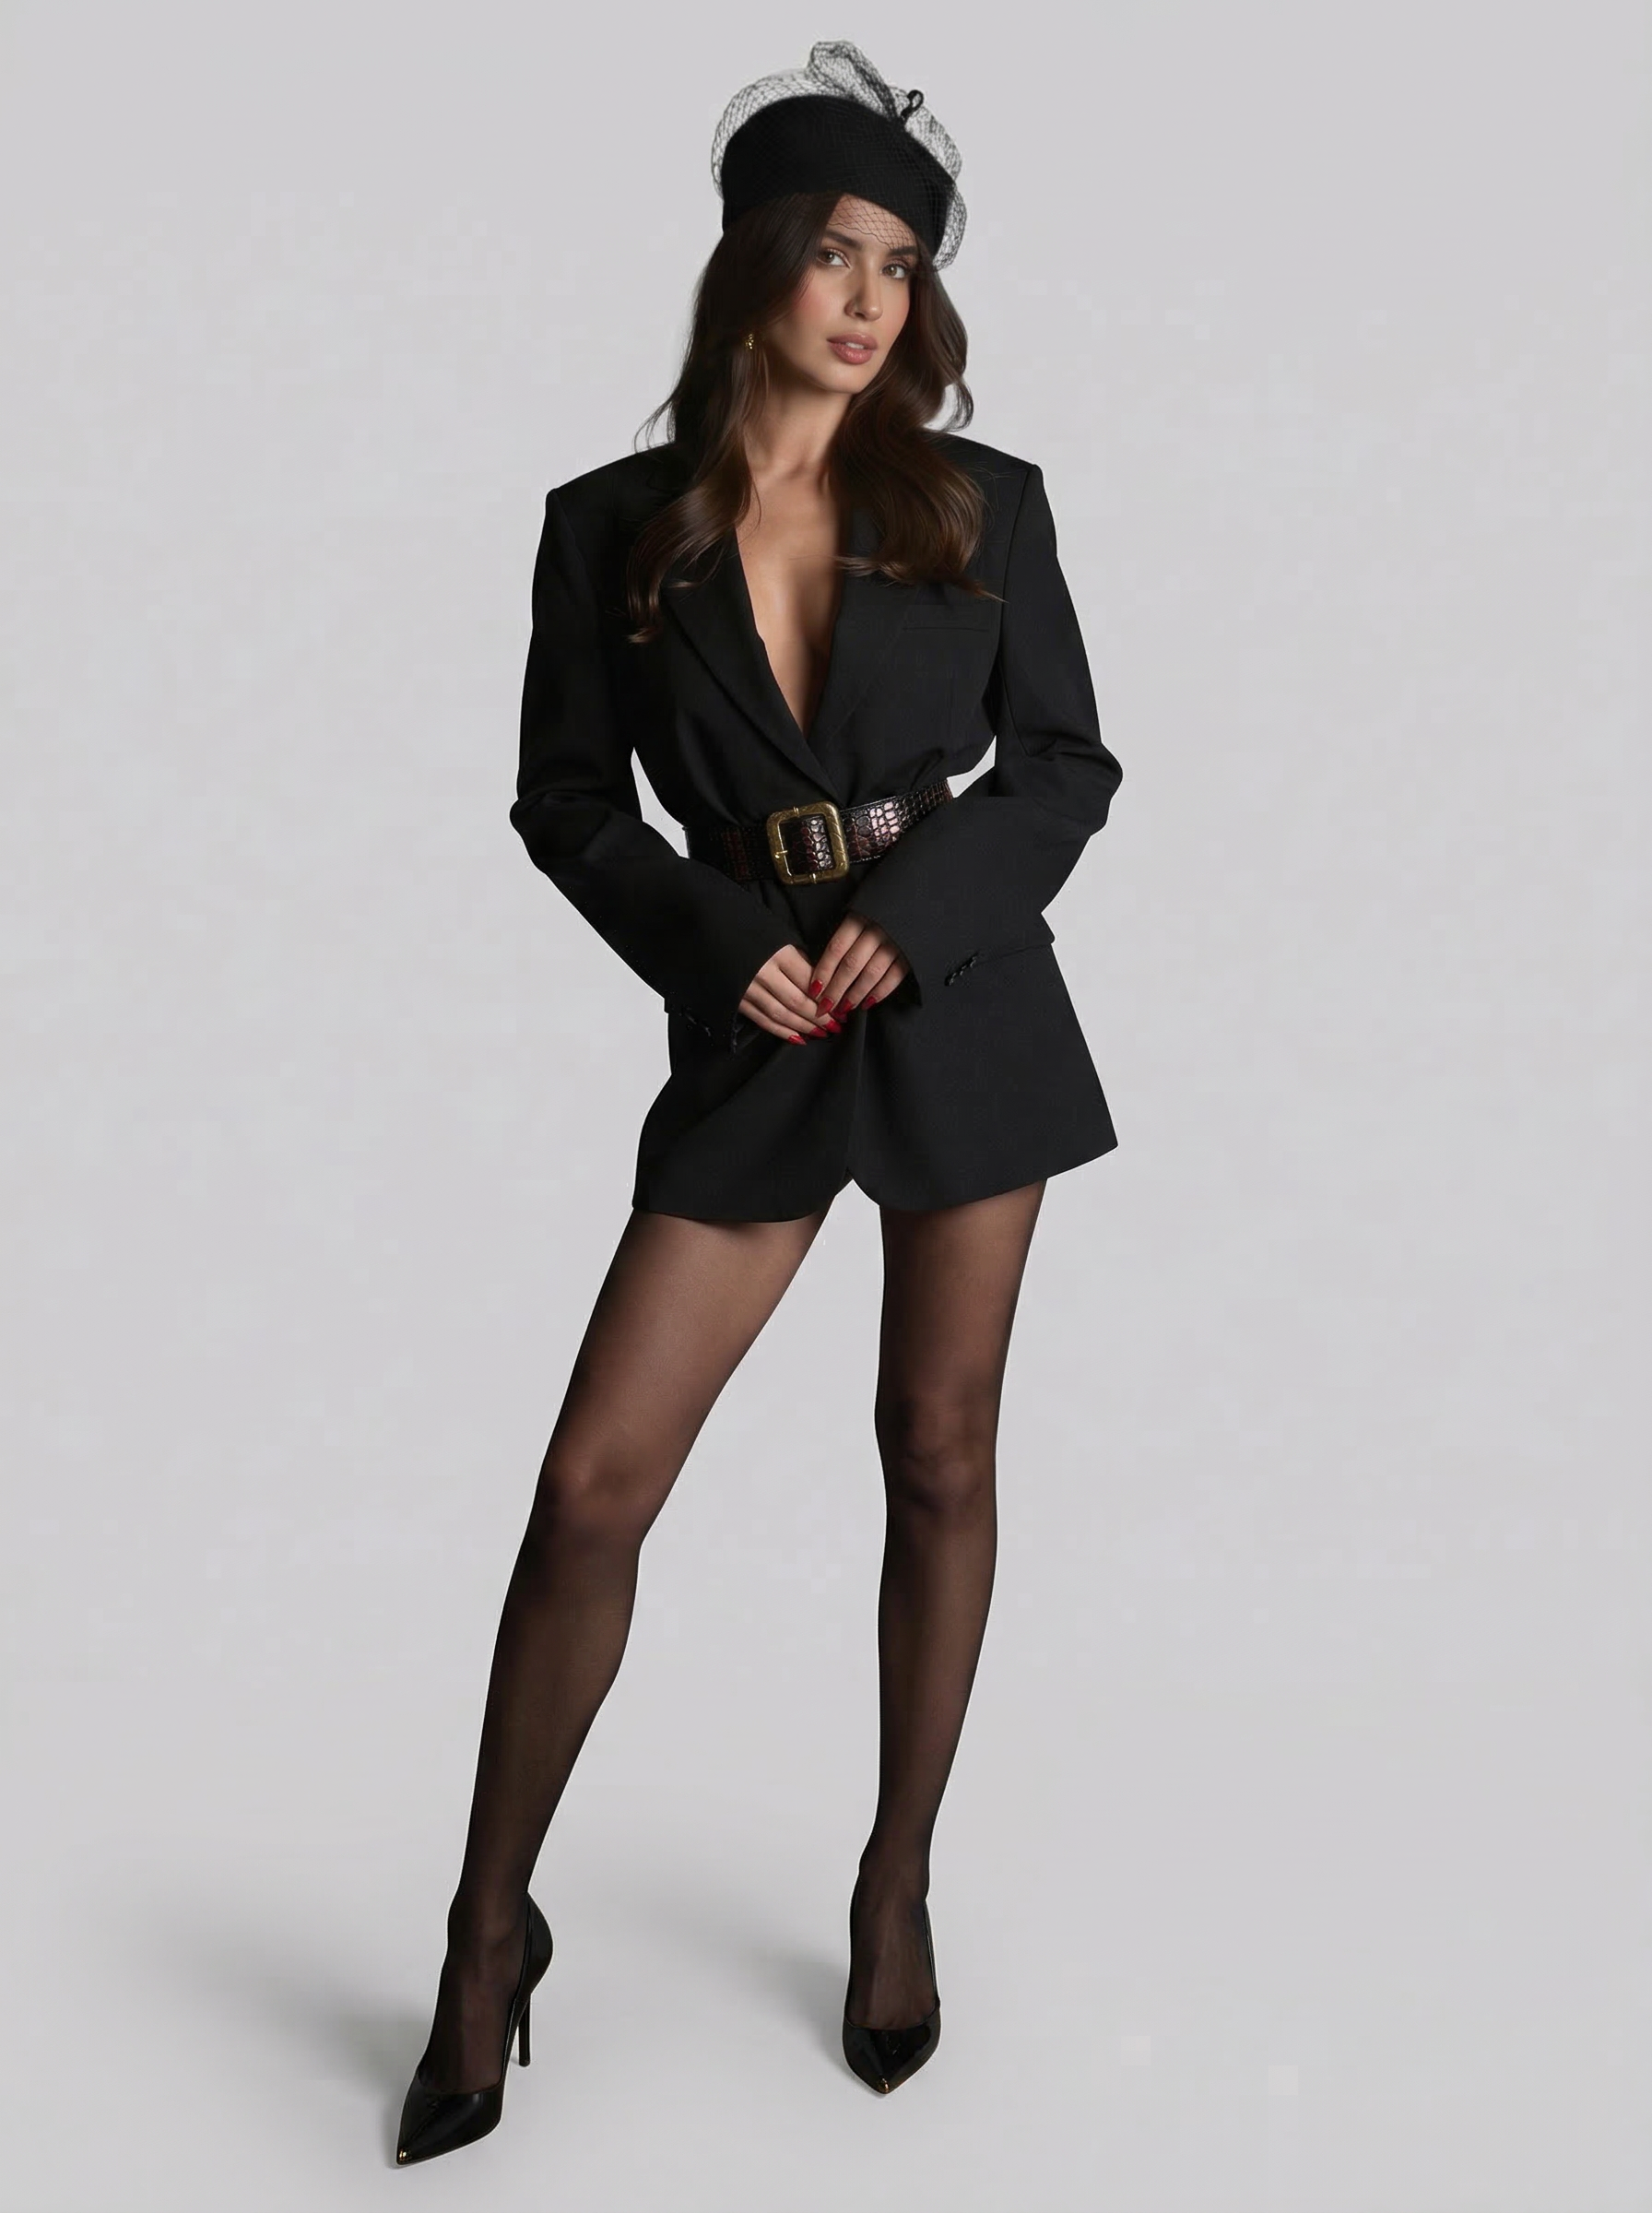
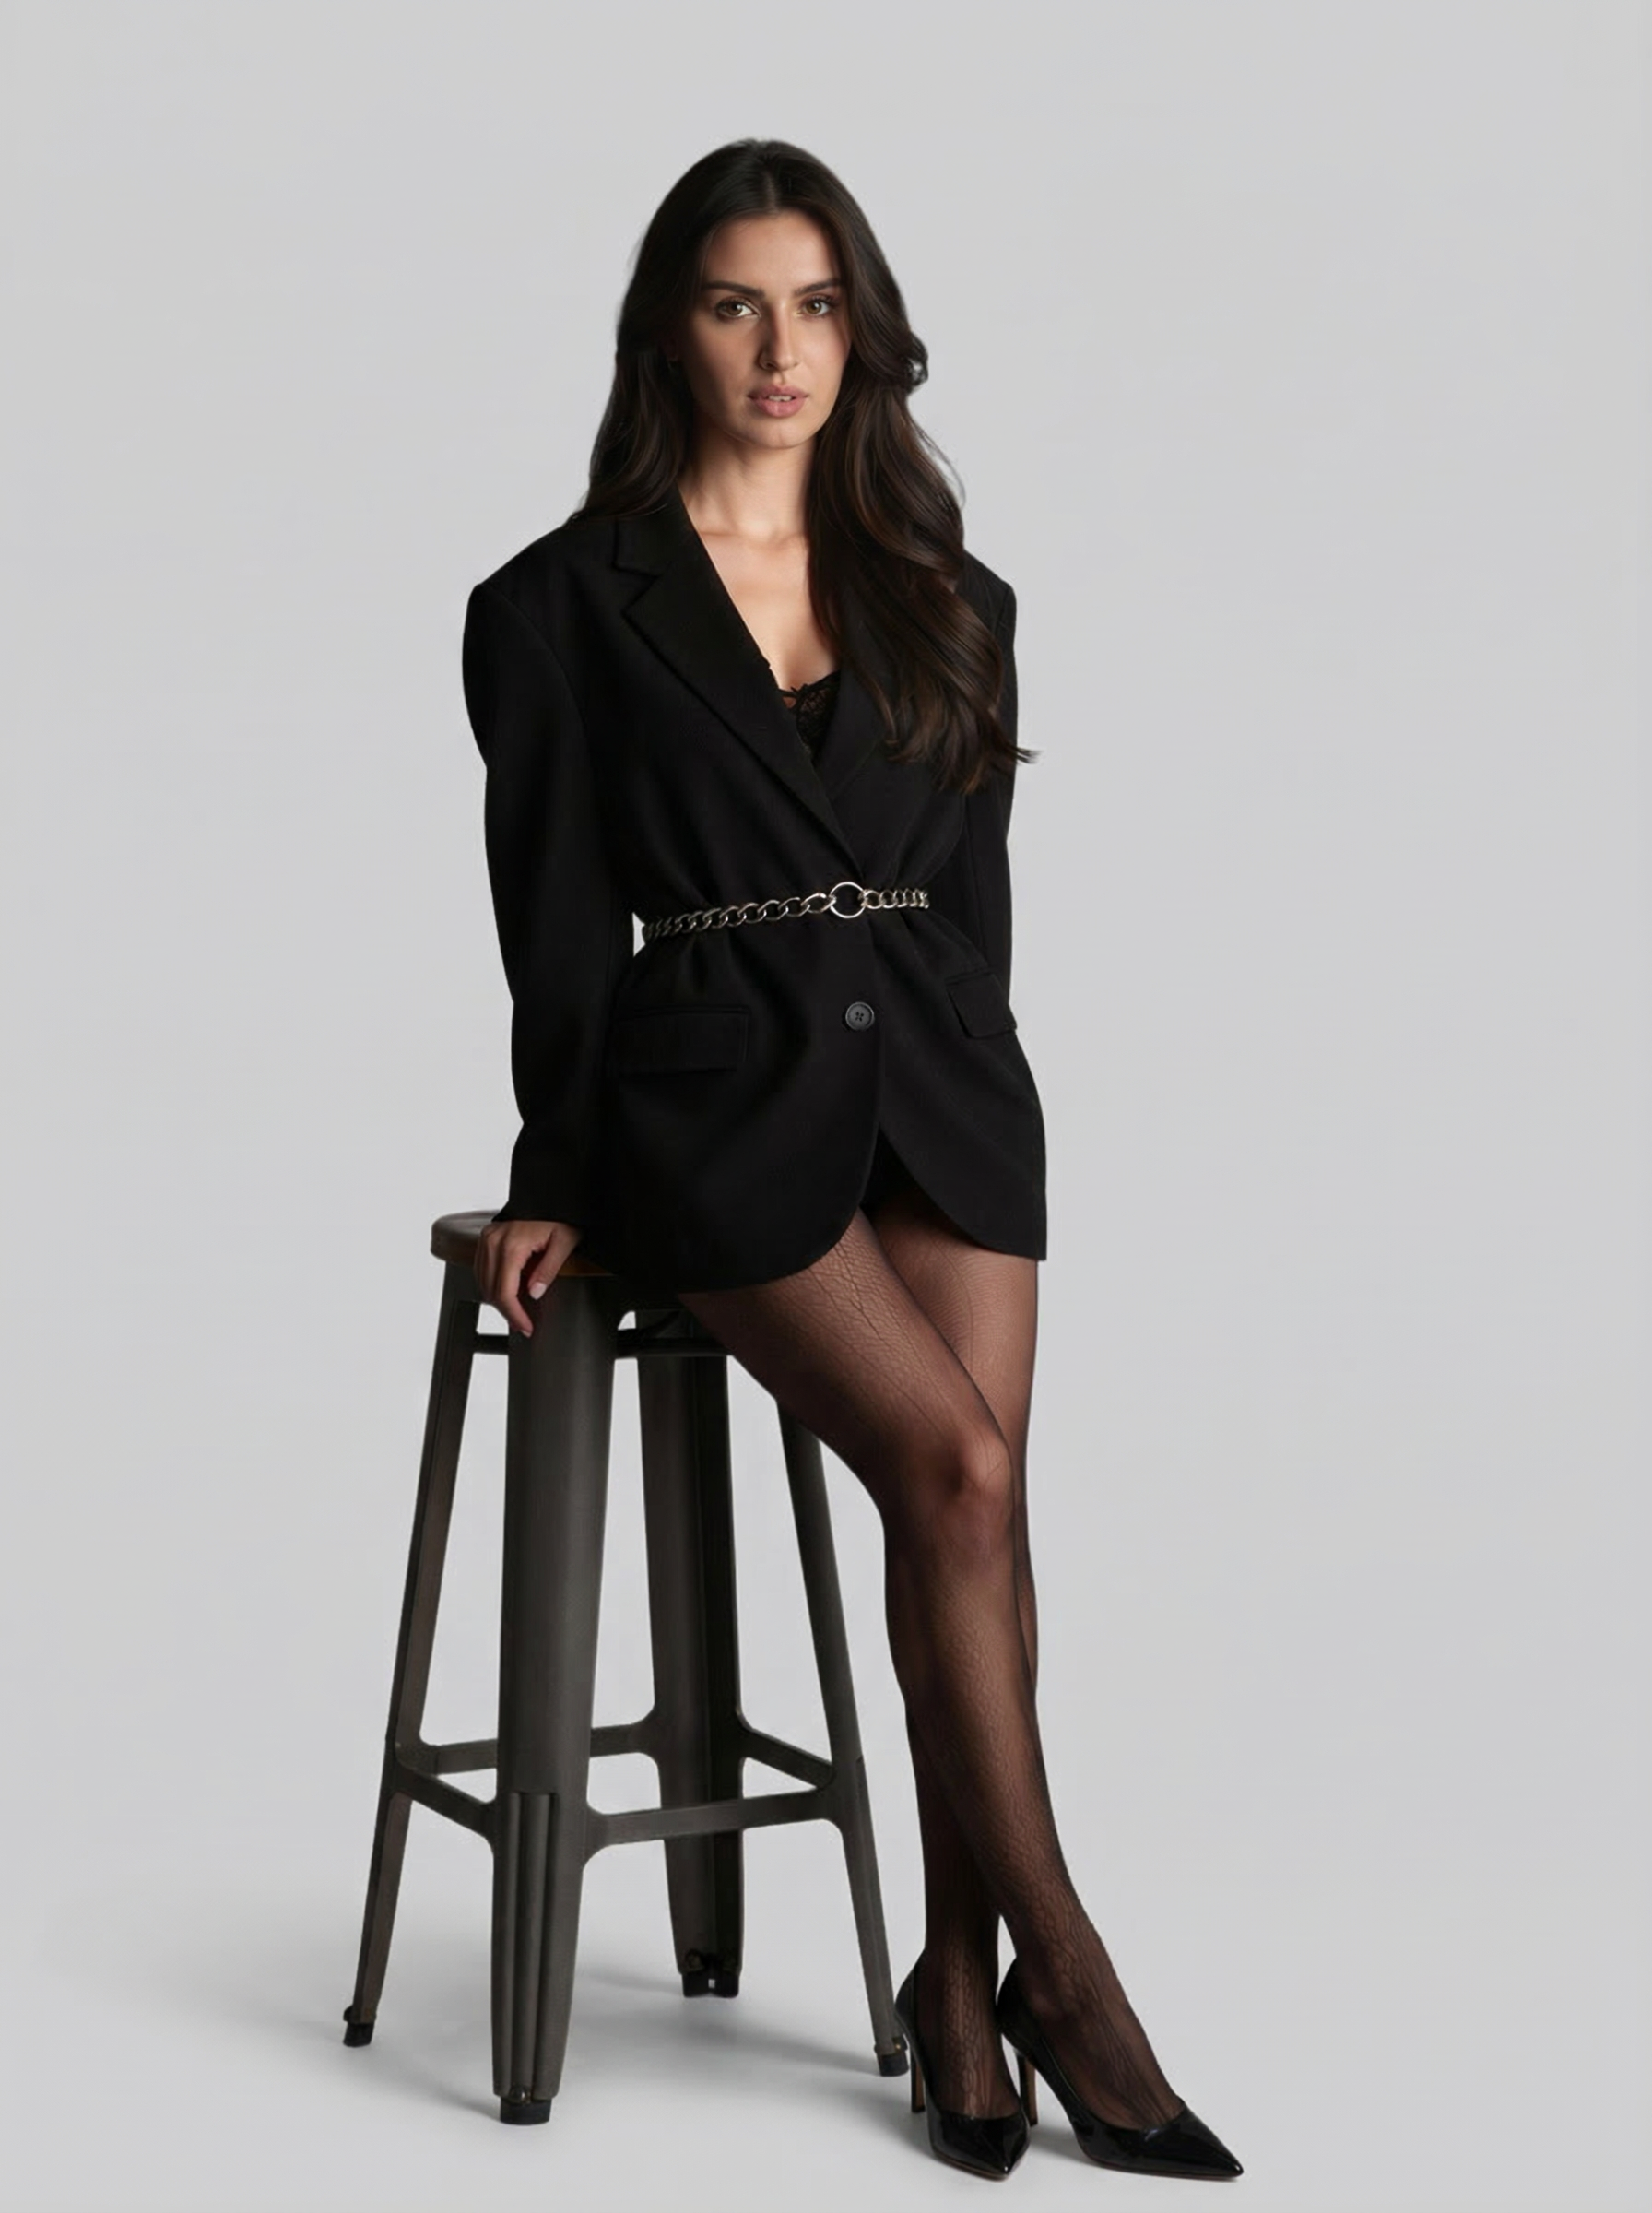
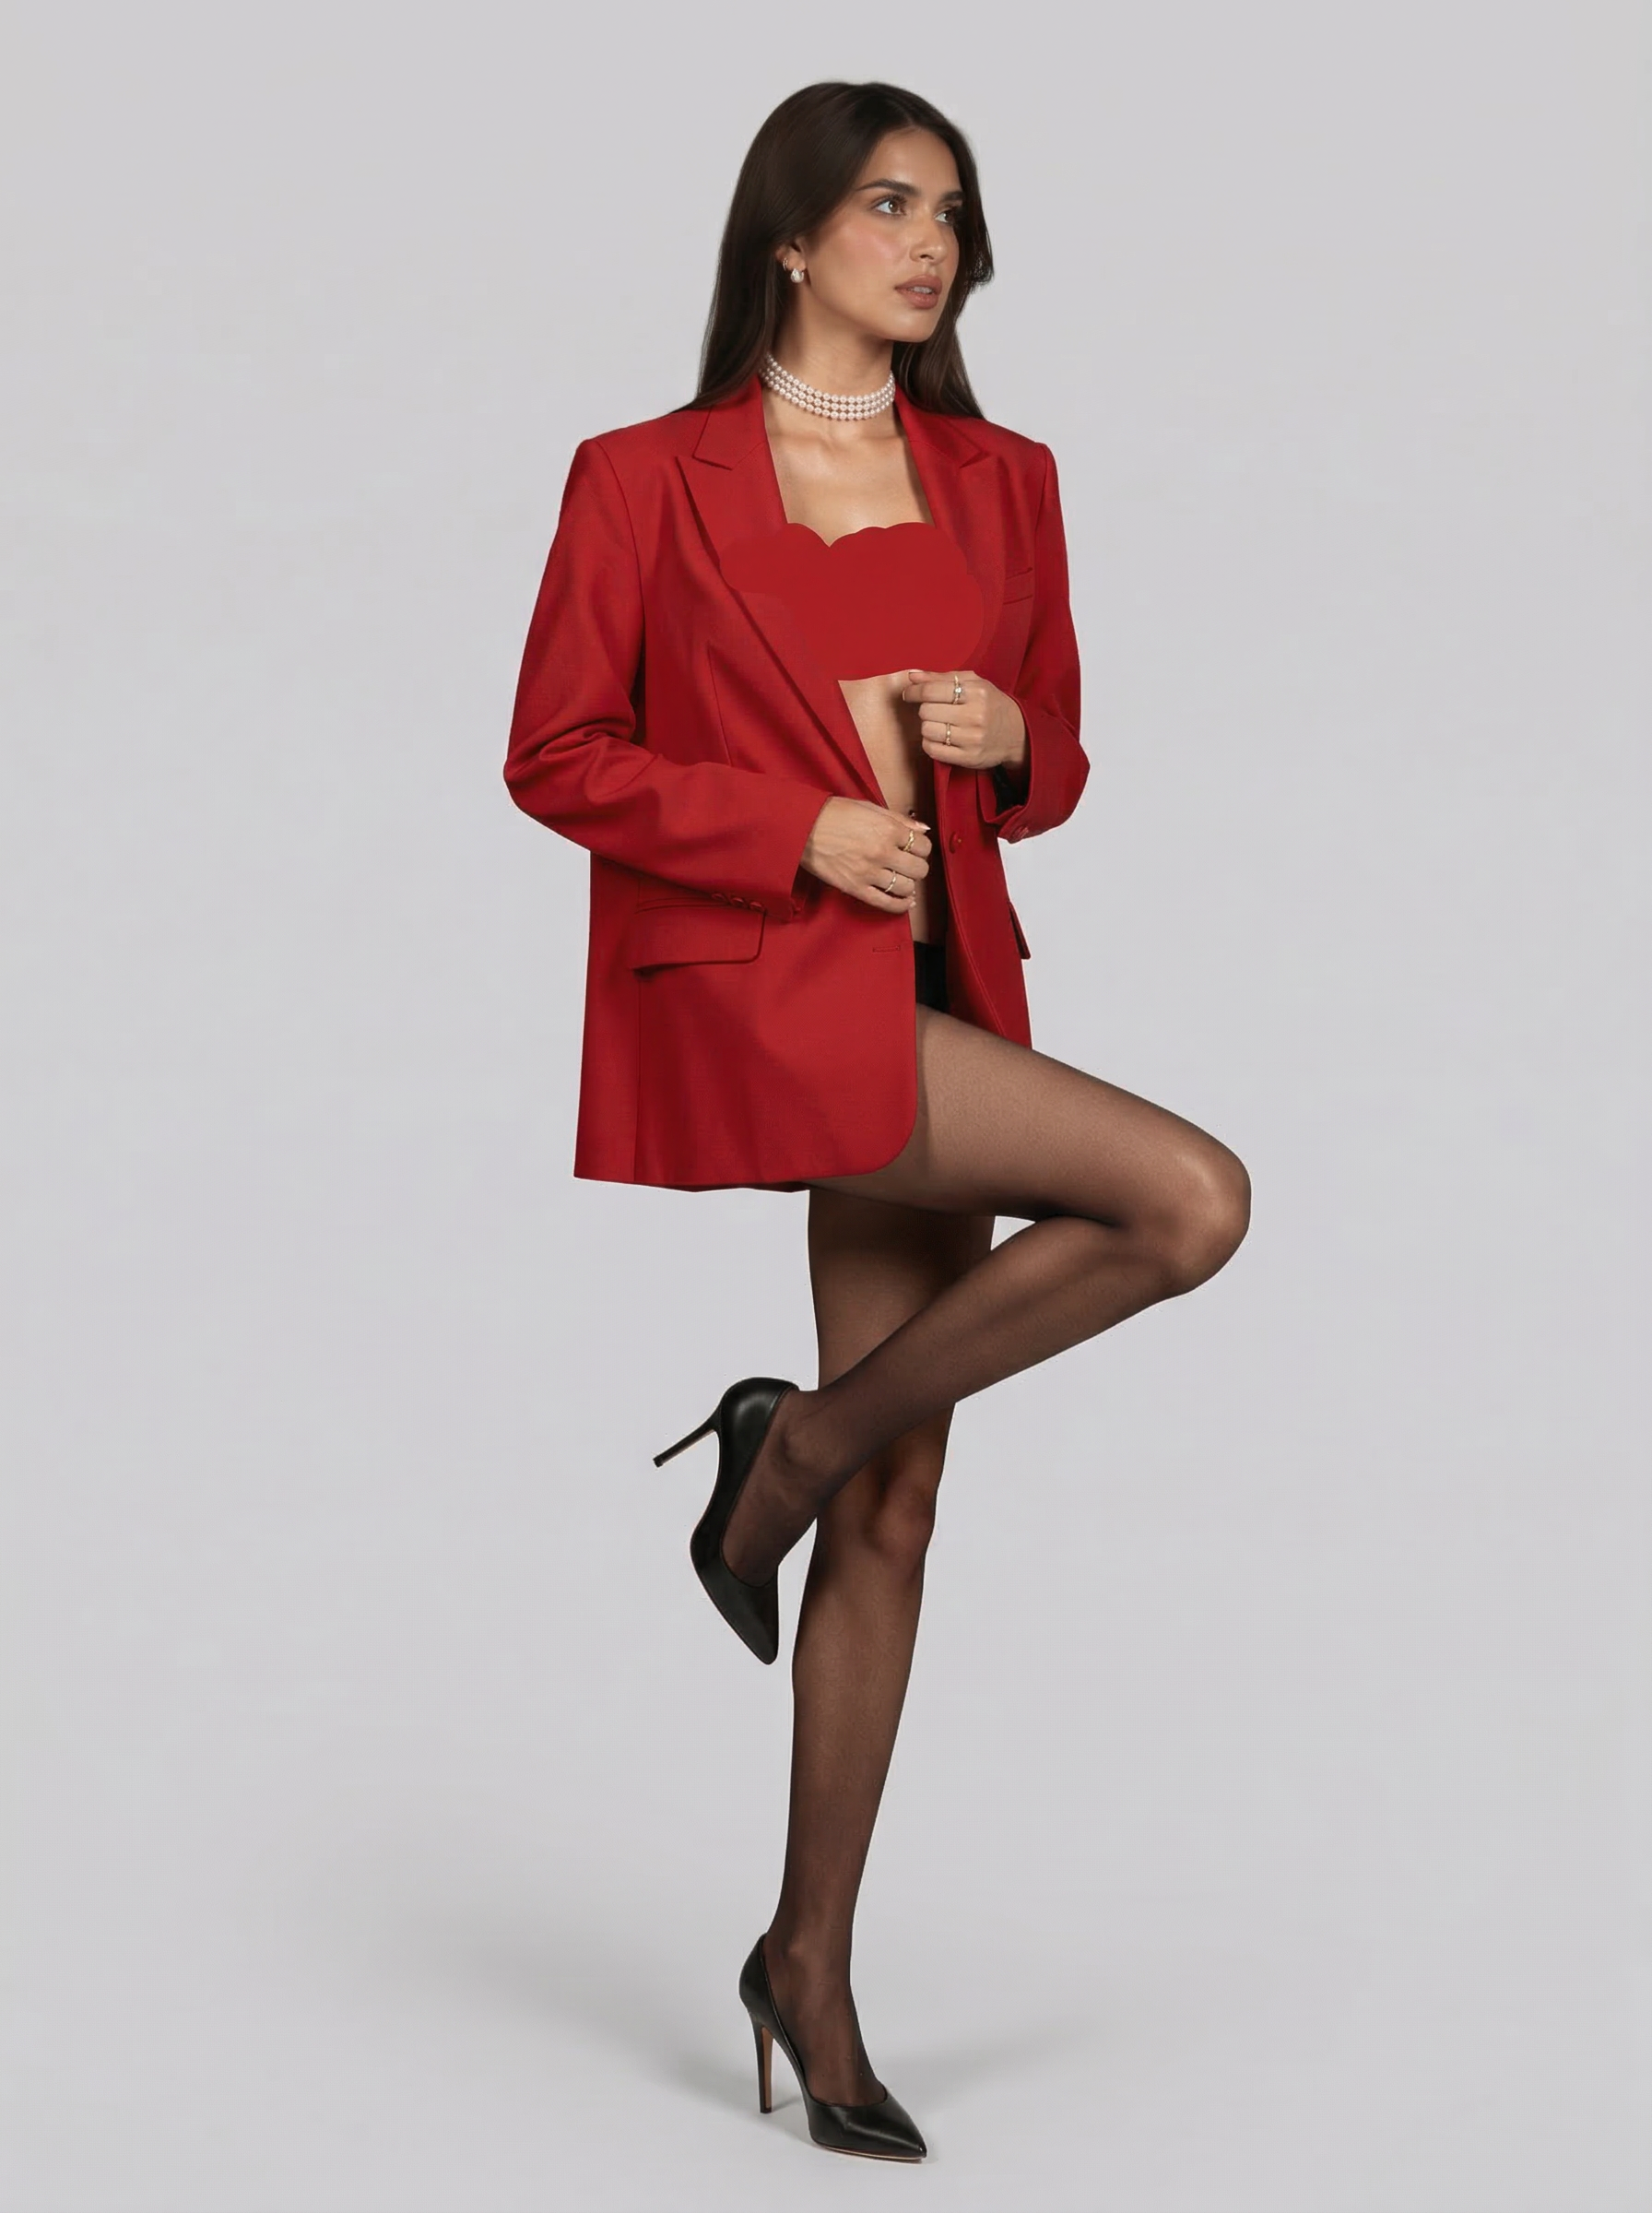
Three of our six scene-styled images, in cinematic 4K, with the lighting and shadows matched for you.
Scene Styling Tips
- No prompt needed: the AI automatically generates appropriate environments
- Output is in 4K resolution for print-ready quality
- Works best with cleanly removed backgrounds (Step 6)
- Each generation costs standard credits — generate 2-3 variations to pick the best
Step 8: Swap in real clothes with the Flat Layout Designer
This is the step that ties it all together. The Flat Layout Designer takes a real clothing flat-lay photo and puts that exact garment onto your AI model images.
We used one single clothing flat-lay image and applied it to all 6 of our scene-styled model images. The tool preserves:
- The exact fabric texture, pattern, and color of the real garment
- The model's body pose, proportions, and identity
- Natural draping, wrinkles, and fit
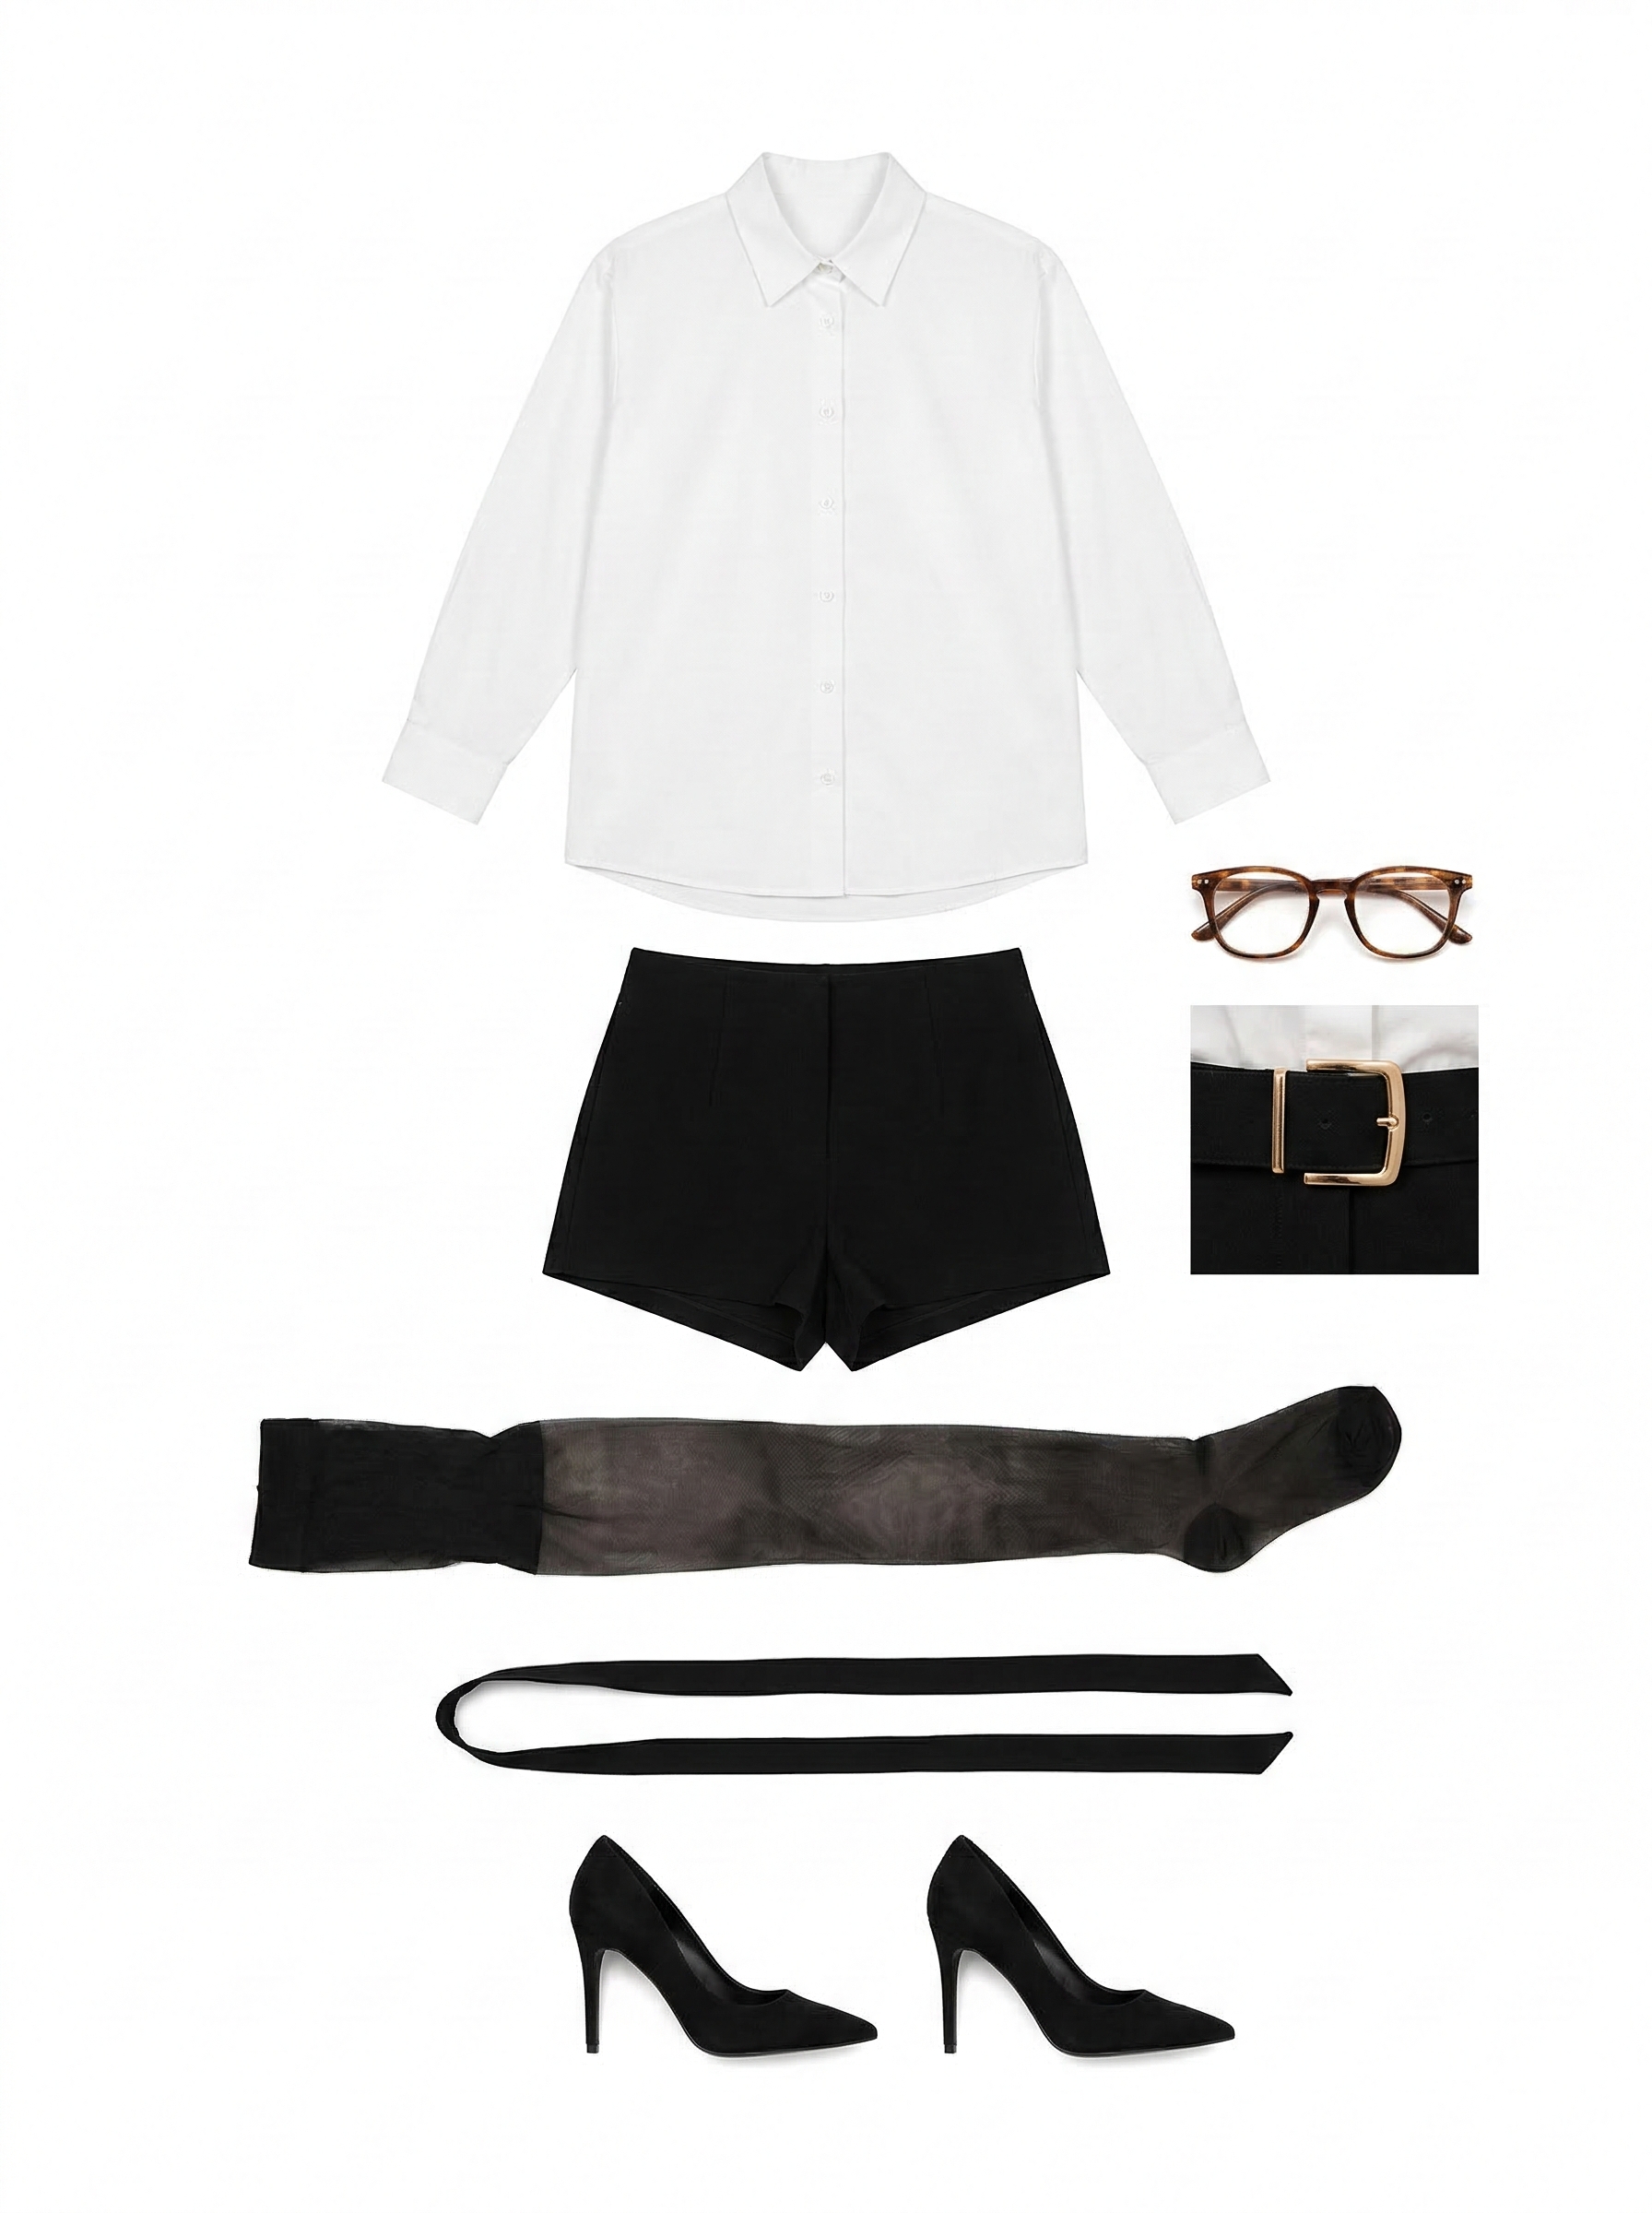
Input: Clothing flat-lay
Model: Scene-styled
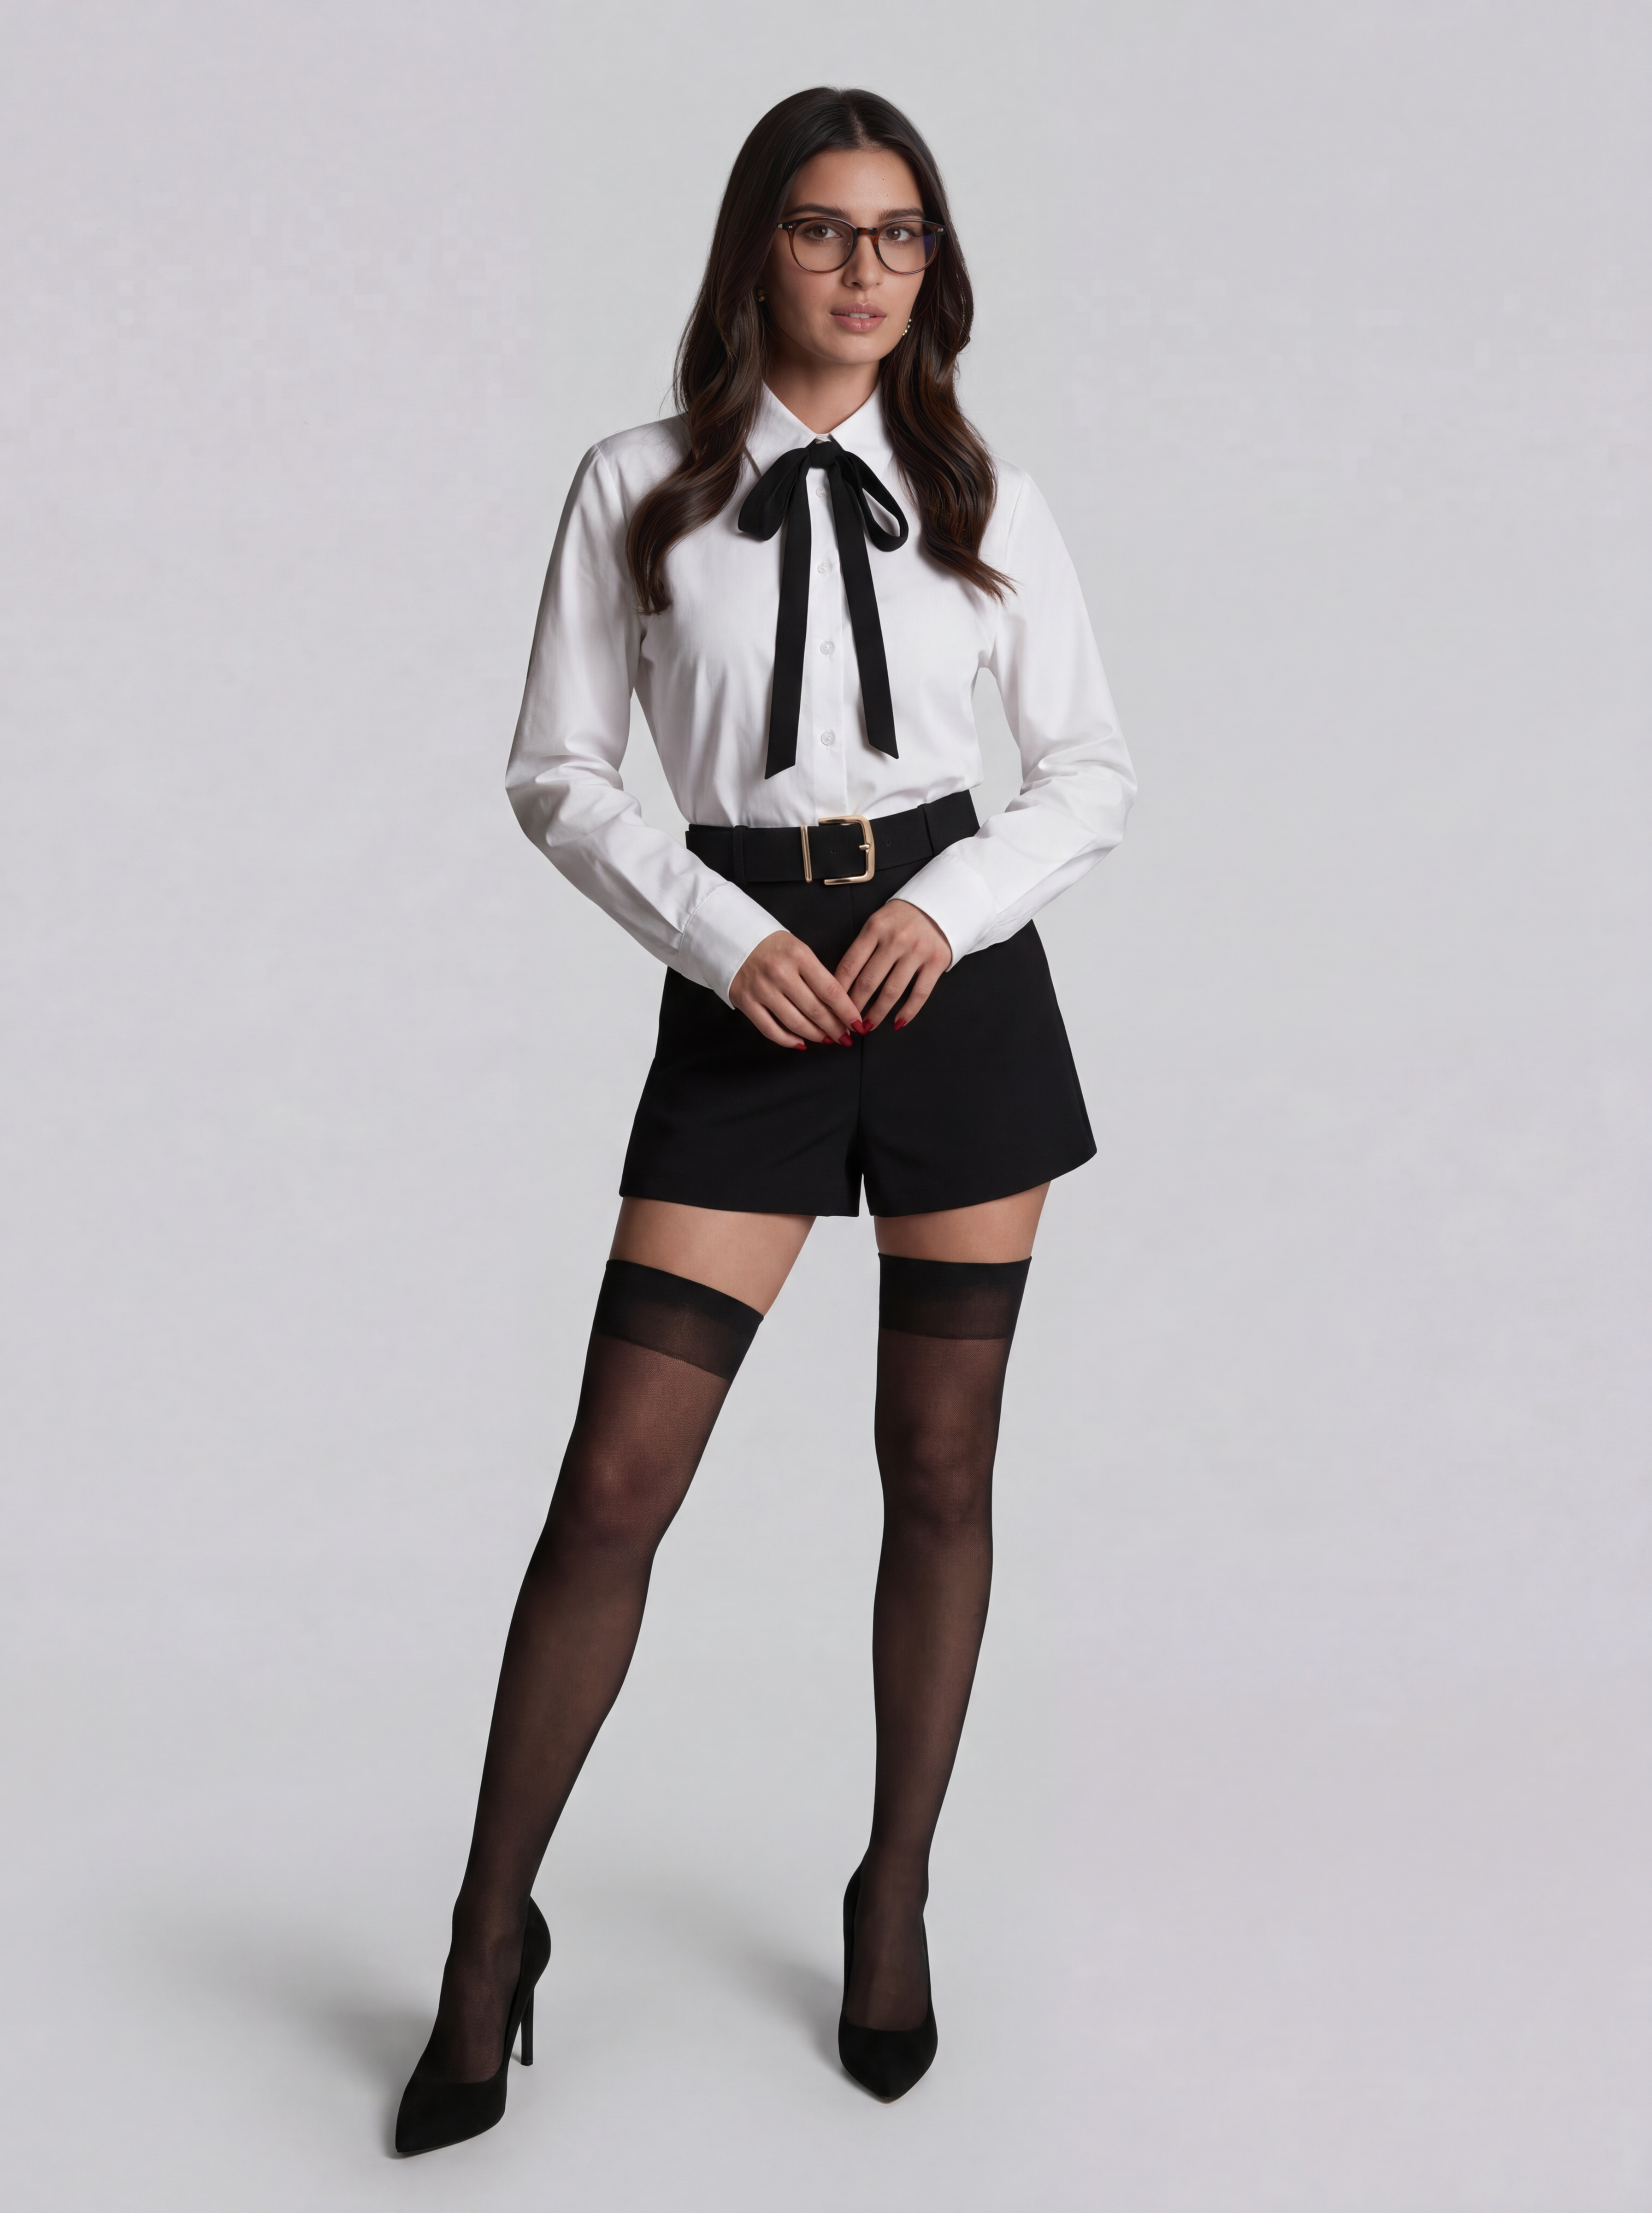
Result: Swapped!
Flat Layout Designer Tips
- Clothing photo: Use a clean flat-lay on white/neutral background
- Resolution: Higher resolution clothing photos = sharper fabric detail in output
- One outfit works across all images: perfect for lookbook consistency
- Works with dresses, tops, pants, full outfits, and more
Step 9: Perfect the face with Face Refinement Pro
The final step brings everything together. Face Refinement Pro uses your trained LoRA to enhance facial detail, sharpness, and ensure your model identity is perfectly consistent across every image.
Exact Settings Used
| Setting | Value | What It Controls |
|---|---|---|
| Prompt | xarnish | Activates your trained face LoRA |
| LoRA | xarnish_imagezface.safetensors | Your custom face model |
| LoRA Strength | 0.90 | How strongly the LoRA influences the face |
| Face Temperature Start | 0.70 | Initial inpainting — higher = more change |
| Face Temperature End | 0.08 | Final refinement — lower = finer detail preservation |
Understanding face temperature
- Face Temperature Start (0.70): Controls how aggressively the tool redraws the face initially. Higher values allow more creative changes, lower values preserve the existing face more.
- Face Temperature End (0.08): Controls the final refinement pass. We set this very low (0.08) so the fine details — pores, skin texture, iris patterns — are preserved with surgical precision.
- The gap between Start and End is the key: starting high (0.70) and ending very low (0.08) means "make significant identity corrections first, then lock in fine detail."
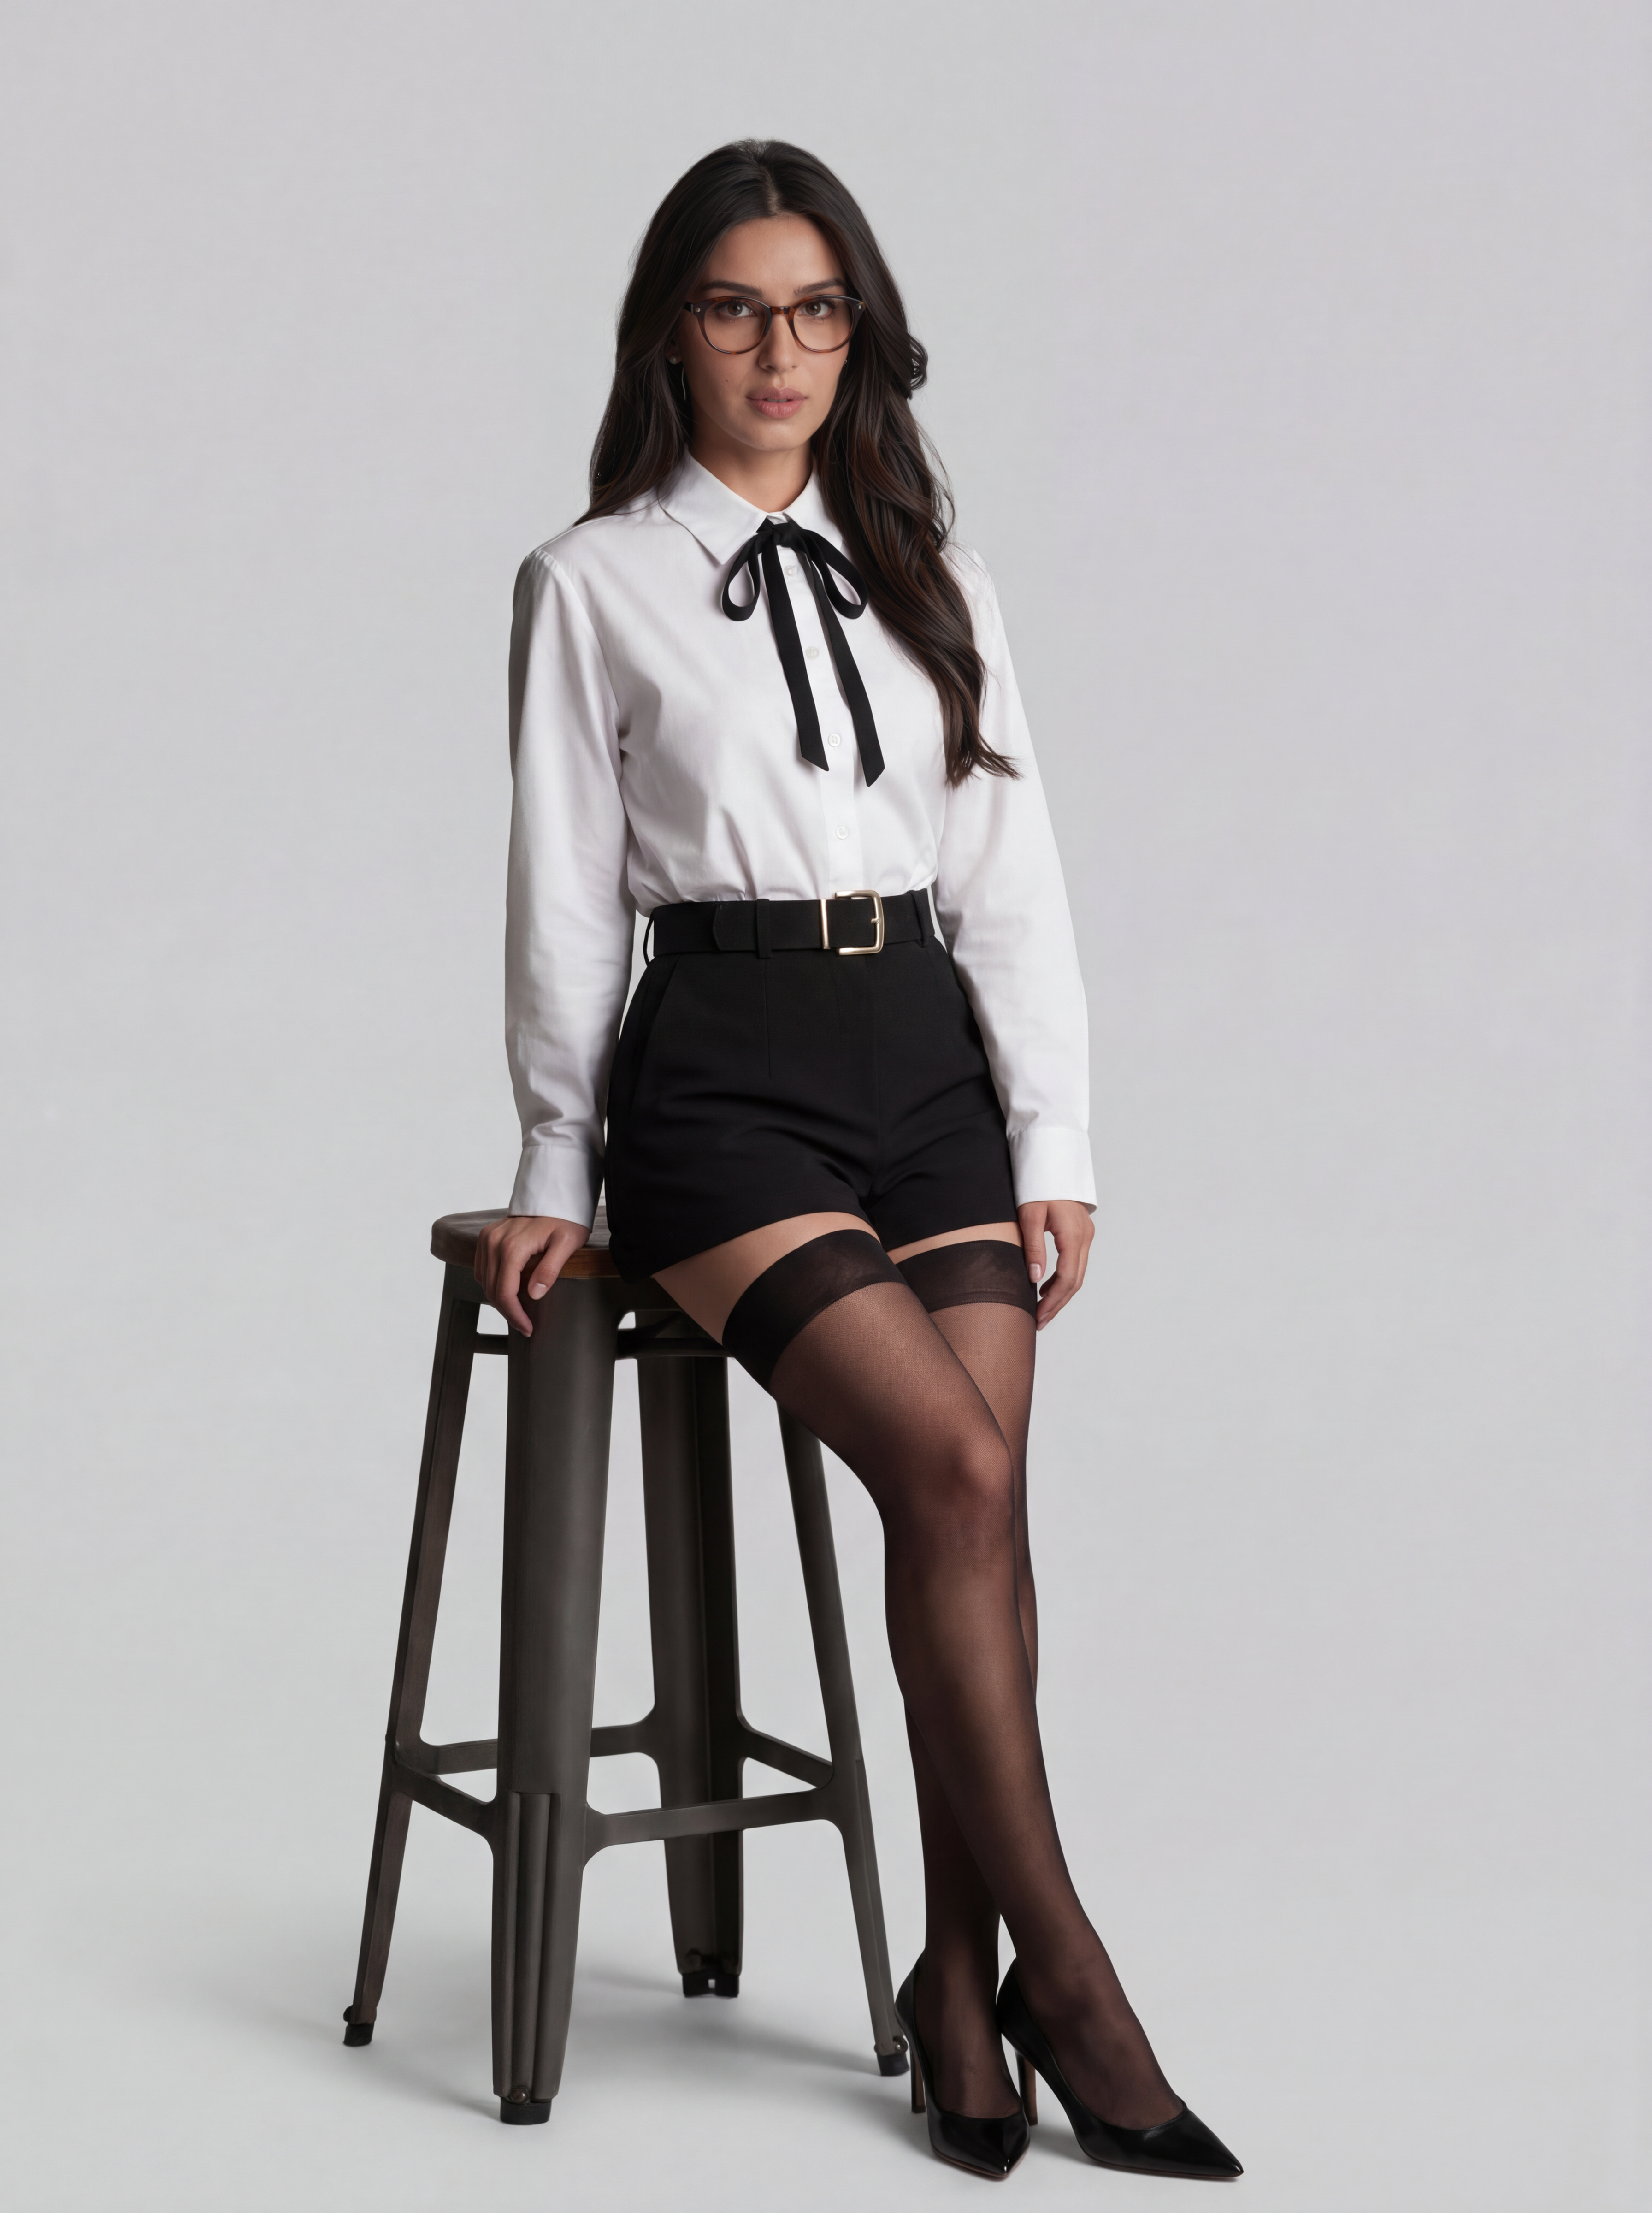
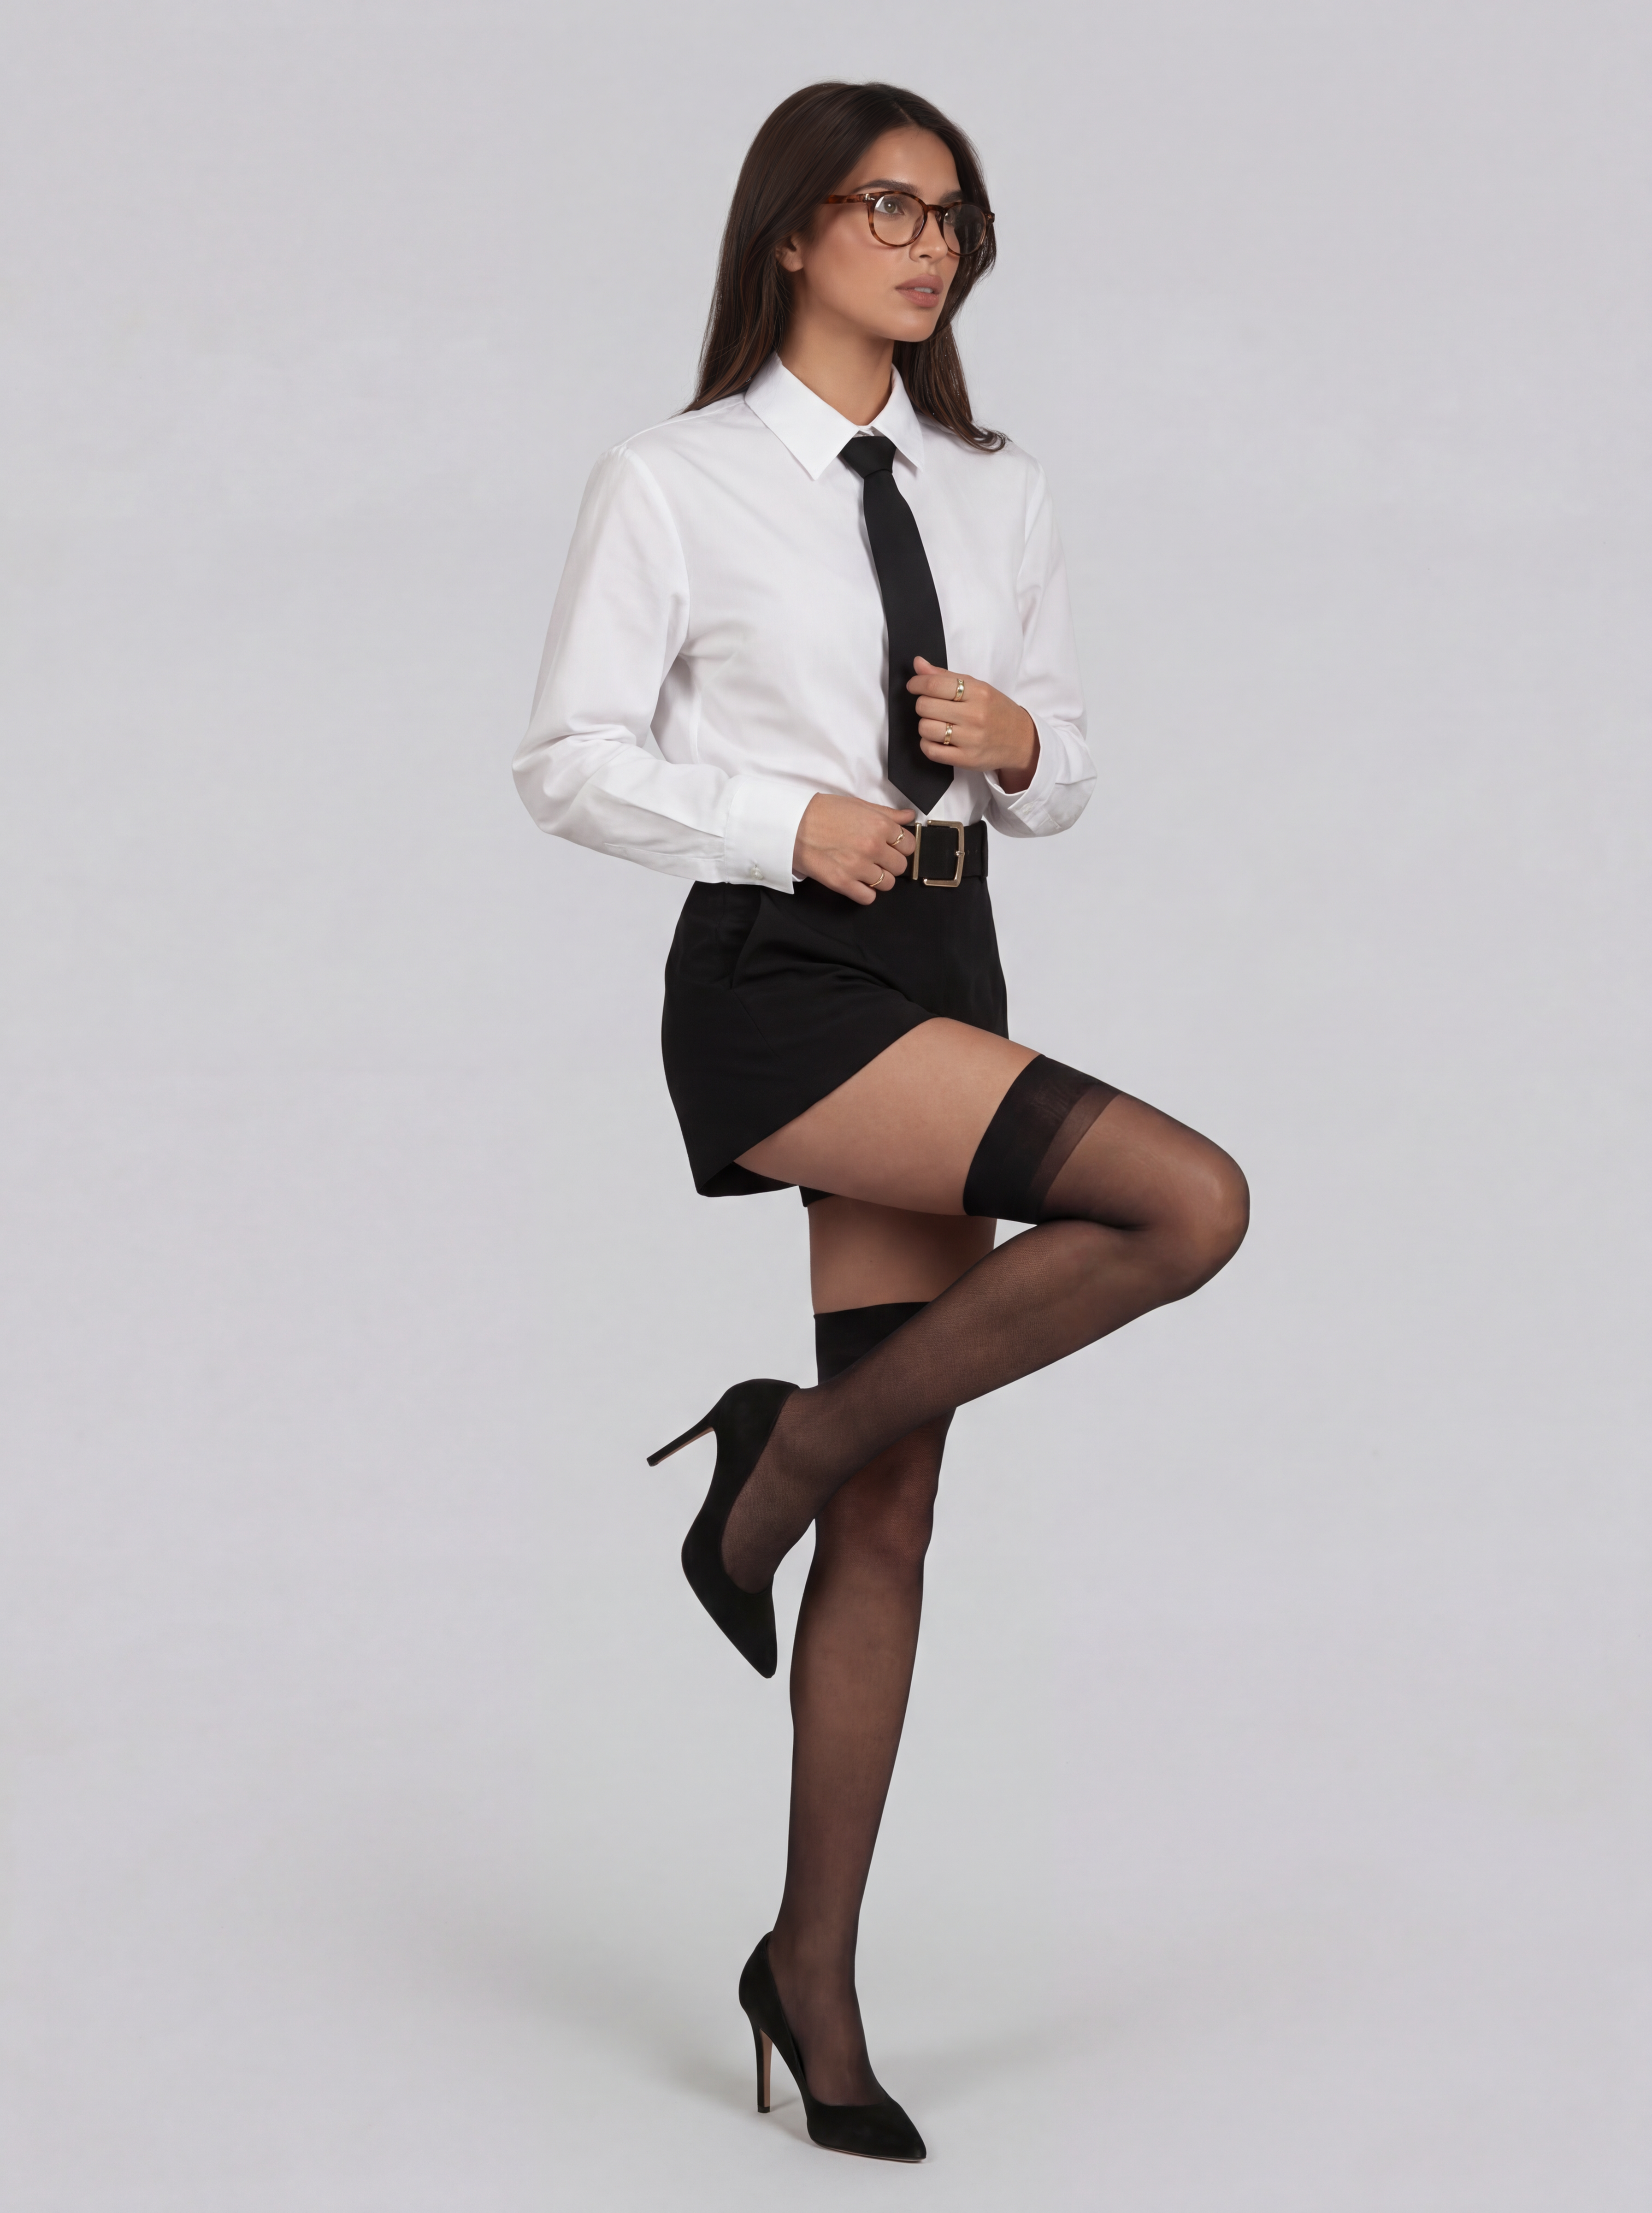
The final, face-refined 4K editorial images: magazine-quality detail, same face throughout.
The Final Results: Before → After
Here's the whole transformation, from one AI base face to six photoshoot-ready editorial images:
Started with: 1 base face
Prompt Cheat Sheet for LoRA-Based Generation
Here are example prompts you can adapt for your own LoRA-trained model. Replace xarnish with your own trigger word.
Editorial Portrait
Street Style
E-Commerce Clean
Lifestyle Scene
LoRA Strength Guide
Getting the right LoRA strength is critical. Too low and you lose identity. Too high and you get artifacts.
| Strength | Effect | Best For |
|---|---|---|
0.60 – 0.70 | Mild — face resemblance, flexible styling | Creative variations, different looks |
0.75 – 0.85 | Balanced — strong identity, natural output | Most production work, body LoRA |
0.85 – 0.95 | Strong — very consistent identity | Face LoRA, identity-critical shots |
0.95 – 1.00 | Maximum — may produce artifacts | Avoid unless face isn't matching |
Our recommended combo: Face LoRA at 0.90 + Body LoRA at 0.85
Cost Breakdown
Here's what this entire 9-step workflow cost in credits:
| Step | Tool | Images | Credits |
|---|---|---|---|
| 1 | Guided Edit (base face) | 1 | ~40 |
| 2 | Multi Input Composition (dataset) | 36 | ~200 |
| 3 | Caption Generator | 36 | ~50 |
| 4 | Model Training Studio | — | ~3000 |
| 5 | Pose Transfer Pro (6 images) | 6 | ~240 |
| 6 | Image Remove BG | 6 | Free |
| 7 | Scene Styling Model | 6 | ~240 |
| 8 | Flat Layout Designer | 6 | ~240 |
| 9 | Face Refinement Pro | 6 | ~240 |
| Total | ~4,250 credits (~$42.50) | ||
That's 6 photoshoot-ready 4K editorial images for under $45: compared to $3,000+ for a traditional photoshoot.
Key Takeaways
- Train once, generate forever: your LoRA model is reusable for unlimited future generations
- The trigger word is everything: always start your prompt with it (e.g.,
xarnish) - Two LoRAs beat one: separate face and body LoRAs give better results than a single combined one
- Face Temperature gap matters: start high (0.60-0.70), end low (0.08-0.24) for the best detail
- Scene Styling needs no prompt: it intelligently creates environments from your cutout model
- One flat-lay, infinite outfits: the same clothing image works across all your model images
Ready to Build Your Own Pipeline?
Every tool mentioned in this workflow is available right now in your ComfyUIFlows Studio dashboard. Start with Step 1 and work your way through — or jump straight to LoRA training if you already have images.